
Appearance
Your First Session
This tutorial walks you through creating your very first session in FoxCLM. You'll sign in, open the Scheduler, add a session, and see it on the calendar. Should take about 5 minutes.
1. Sign in
Go to the login page and enter your email and password.
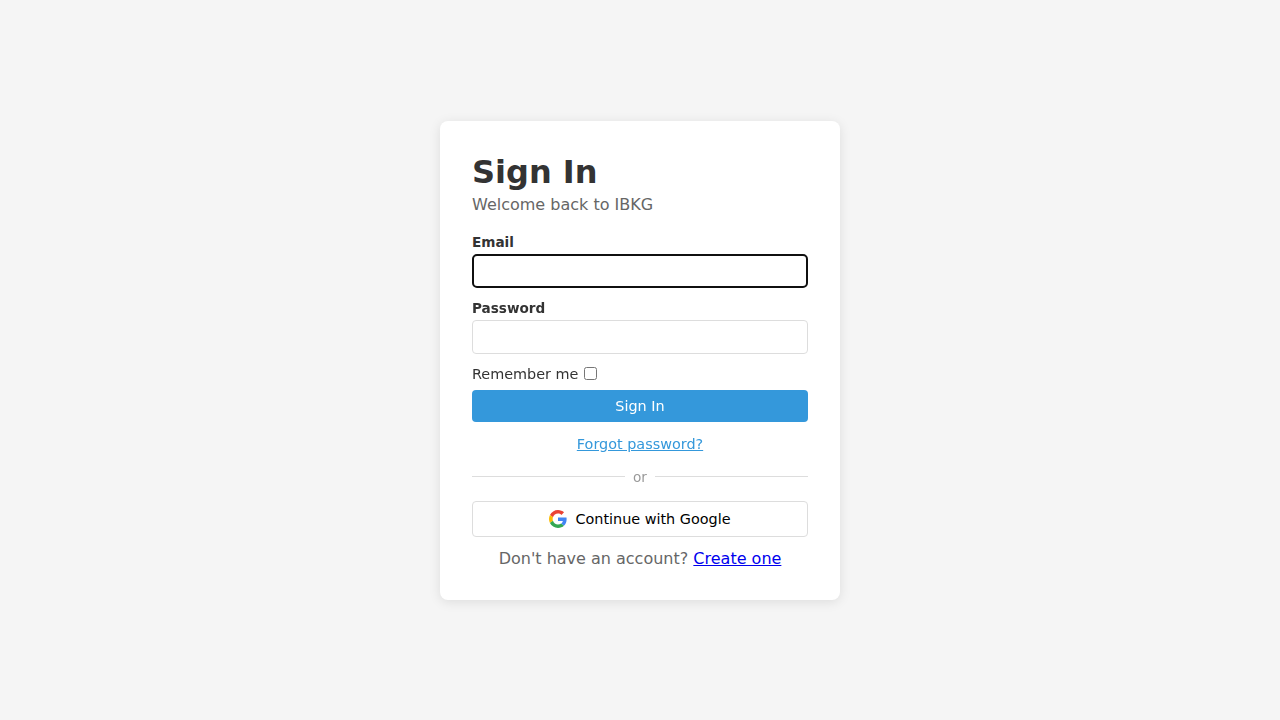
If this is your first time logging in, use the credentials from the welcome email. Tick Remember me if you're on a trusted device.
Click Sign In.
2. Welcome to the dashboard
After login you land on the Dashboard. The left sidebar lists every feature you have access to. The top bar has search, language, notifications, and your account menu.
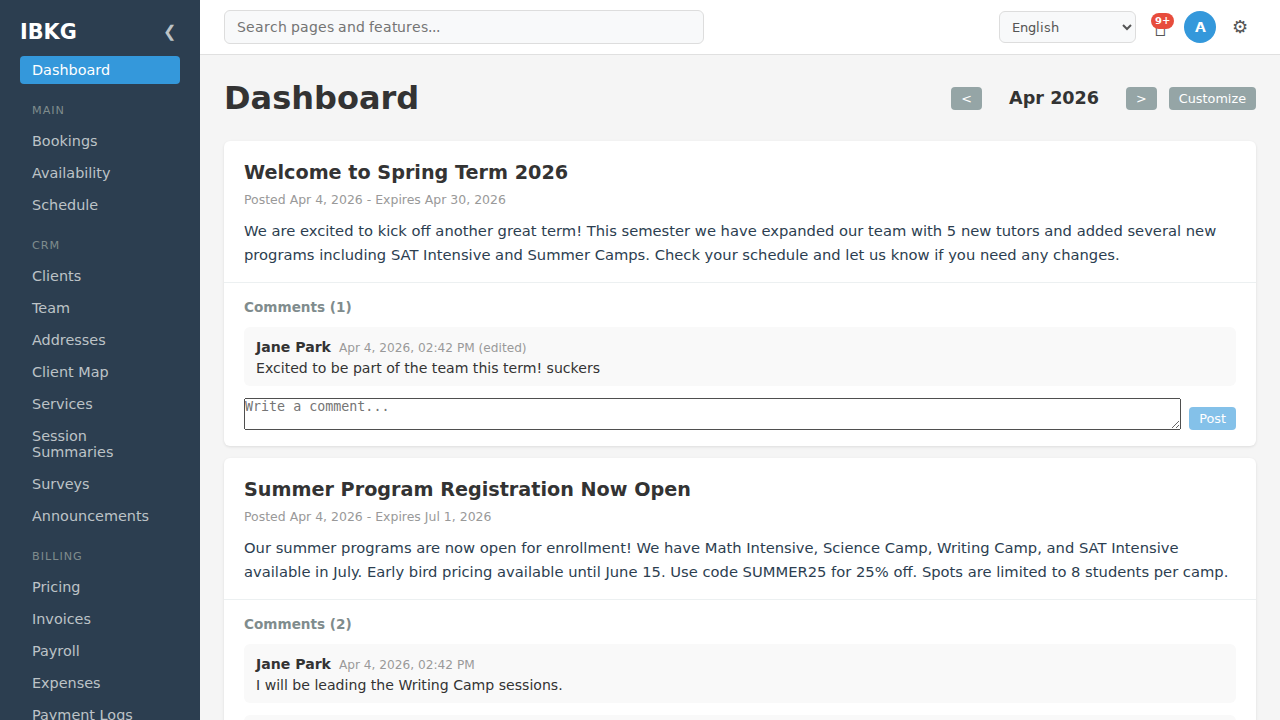
The sidebar groups features by:
- MAIN - Dashboard, Bookings, Availability, Schedule
- CRM - Clients, Team, Addresses, Client Map, Services, Session Summaries, Surveys, Announcements
- BILLING - Pricing, Invoices, Payroll, Expenses, Payment Logs
- Settings (gear icon, top right)
3. Open the Scheduler
Click Schedule in the sidebar. The Scheduler opens with a week view of your calendar.
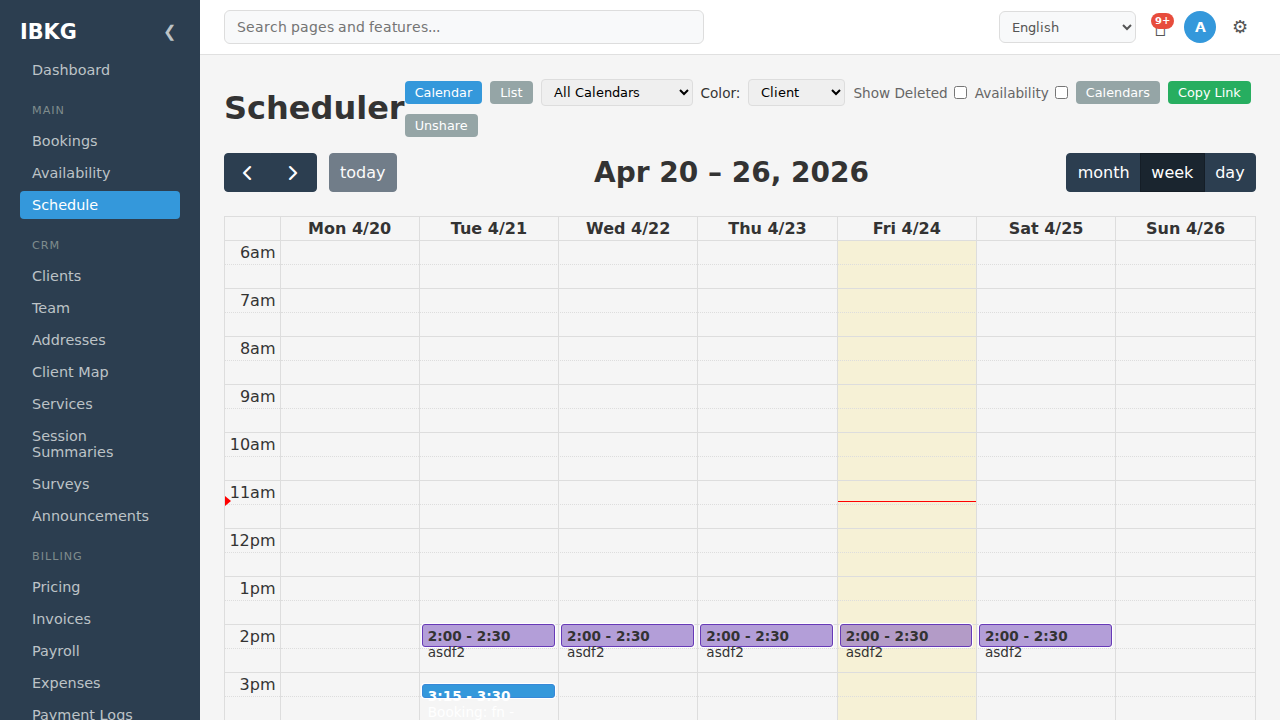
Key controls at the top:
- Calendar / List - switch between calendar grid and list view
- All Calendars - filter to a specific calendar
- Color - colour events by Client, Resource, Status, or Calendar
- Show Deleted - reveal soft-deleted events
- Availability - overlay availability slots on the grid
- Calendars - manage calendars
- Copy Link / Unshare - share a public schedule URL
Navigate dates with the arrows on the left or the today button. Switch between month, week, and day views on the right.
4. Create a new session
Click any empty time slot on the grid. A New Event modal opens pre-filled with the start time you clicked.
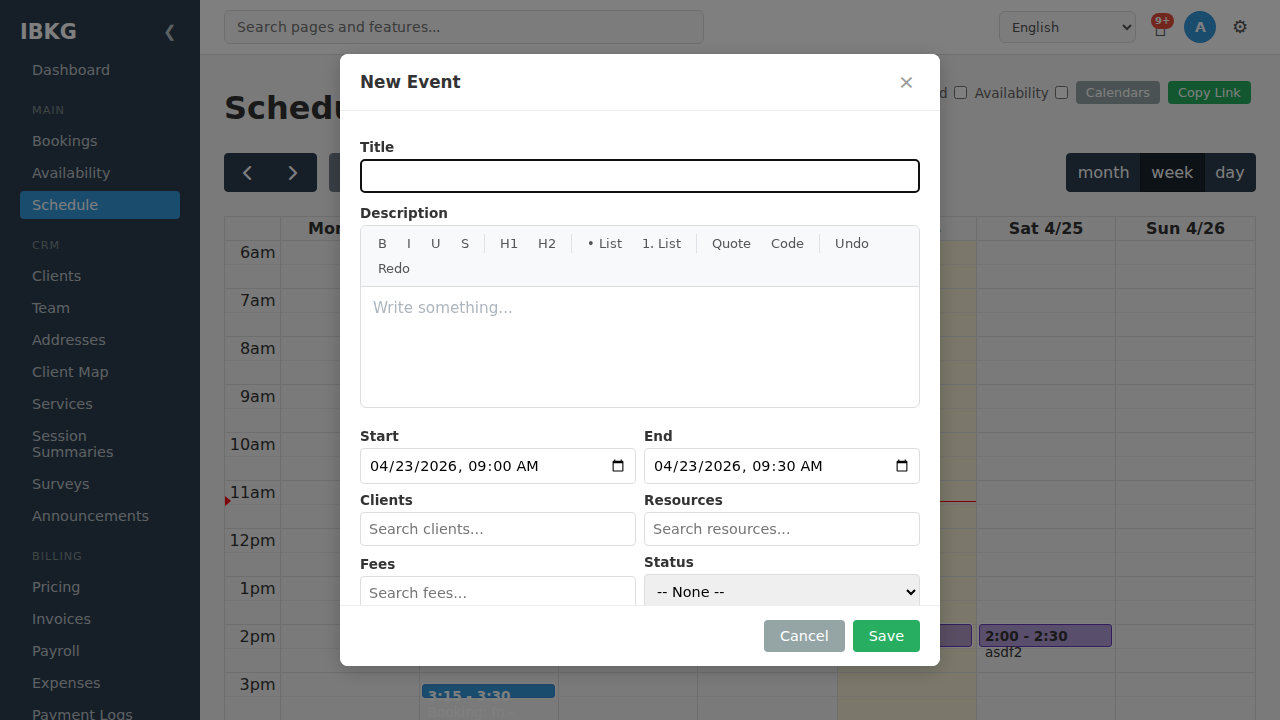
The modal has:
- Title - short name for the session
- Description - rich text editor for notes, links, instructions
- Start and End - date and time
- Clients - who attends (search-as-you-type)
- Resources - rooms, equipment, or other bookable items
- Fees - per-session billing items
- Status - Scheduled, Occurred, Cancelled, etc.
5. Fill in the details
Give the session a descriptive title. A common pattern is Subject - Student Name (e.g. "Maths - Sample Student") so the calendar stays scannable at a glance.
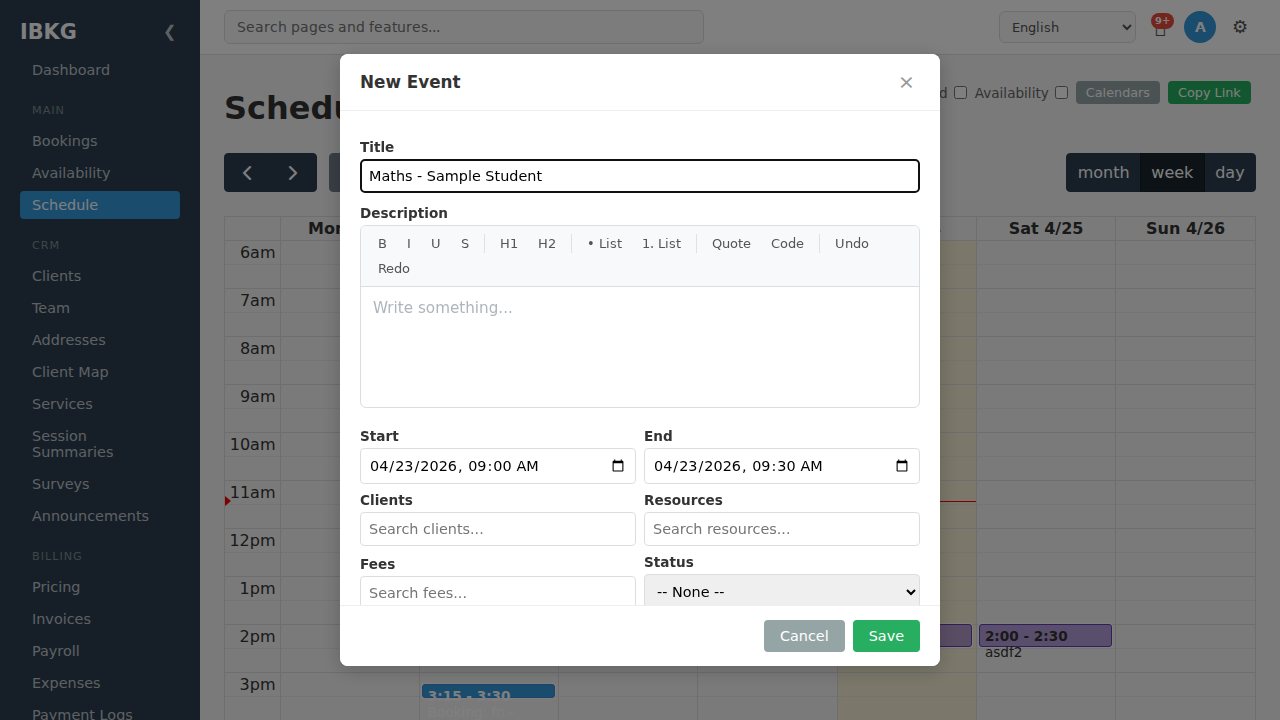
Adjust Start and End if needed. The default is 30 minutes.
In the Clients field, type a name to search your client list. Select one (or several) to link them to the session. The client's email will be used if you later send reminders or booking confirmations.
Leave other fields blank for now - you can always come back later.
6. Save
Click Save in the bottom-right corner.
The modal closes and your new session appears on the calendar, coloured by client (or whatever you picked in the Color dropdown at the top).
7. Manage an existing session
Click any session on the calendar to open it. For a one-off session, you see the full editor. For a recurring session (like a weekly class), you see an Occurrence panel first:
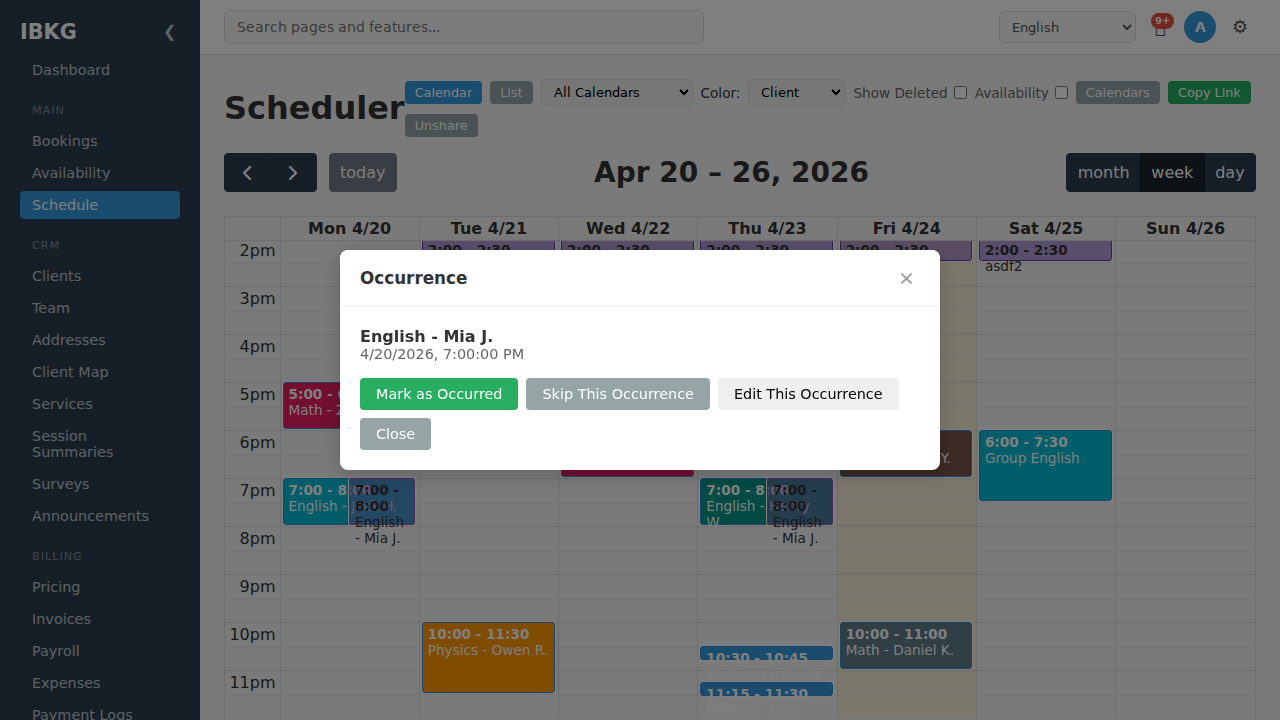
From here you can:
- Mark as Occurred - the session happened as scheduled (this moves it through the status workflow and typically counts toward payroll)
- Skip This Occurrence - cancel just this one instance of a recurring session
- Edit This Occurrence - modify only this instance (opens the full editor)
- Close - dismiss without changes
For one-off sessions (no recurrence), clicking the session opens the editor directly.
What's next
You've scheduled your first session. A few natural next steps:
- Recurring Classes - set up weekly lessons that repeat automatically
- Booking Requests - let new clients request sessions from a public booking page
- Statuses & Workflow - automate reminders and status changes
- Adding Clients - build out your client list before scheduling more sessions