
Appearance
Your First Invoice
This tutorial walks through creating your first invoice in FoxCLM using the new-invoice wizard. In three steps you'll set up the header, pull in sessions from your calendar as line items, and configure currency and tax. Takes about 5 minutes.
Prerequisites: at least one session in Occurred status for one client (see Your First Session) and a client record.
1. Open the Invoices page
Click Invoices in the sidebar (under BILLING).
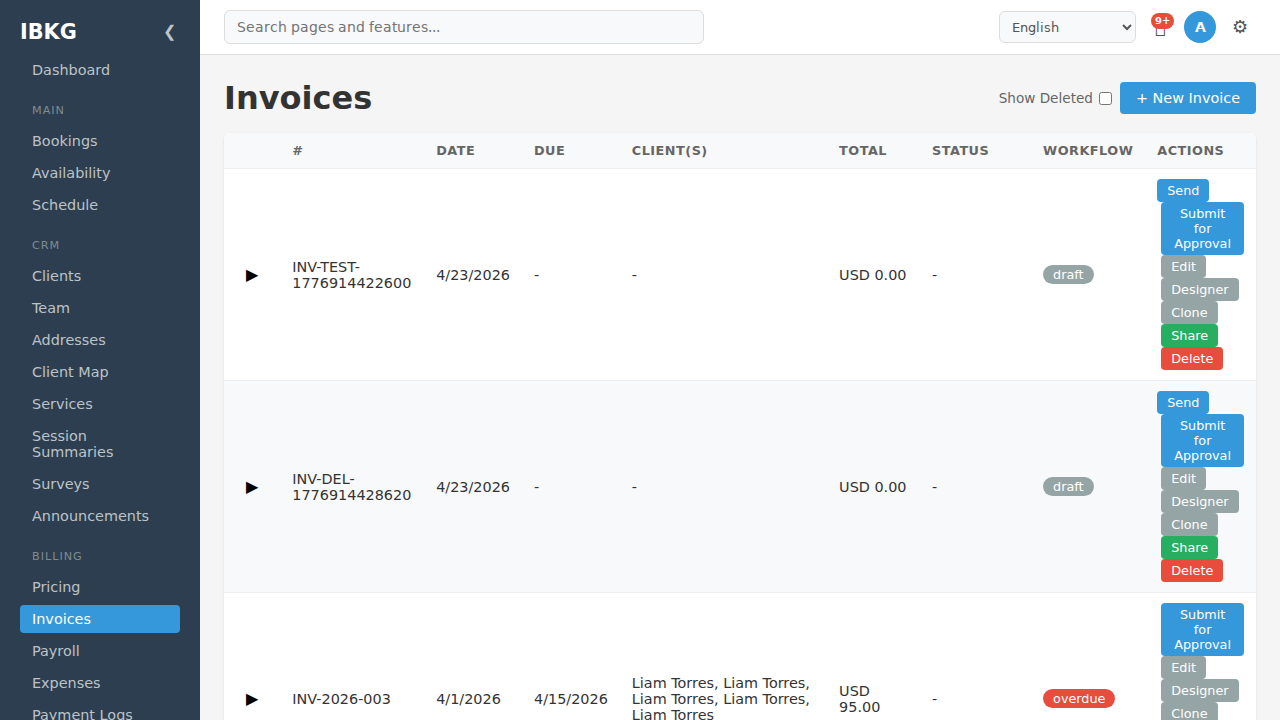
The Invoices page shows every invoice with:
- # - invoice number
- Date / Due - issued and due dates
- Client(s) - who the invoice is for
- Total - amount and currency
- Status - your custom status (e.g. "Approved")
- Workflow - the workflow state badge (
draft,sent,paid,overdue,cancelled) - Actions - contextual buttons per invoice: Send, Submit for Approval, Edit, Designer, Clone, Share, Delete
Click + New Invoice at the top right to start.
2. Step 1 - Details
The wizard opens with the Details step:
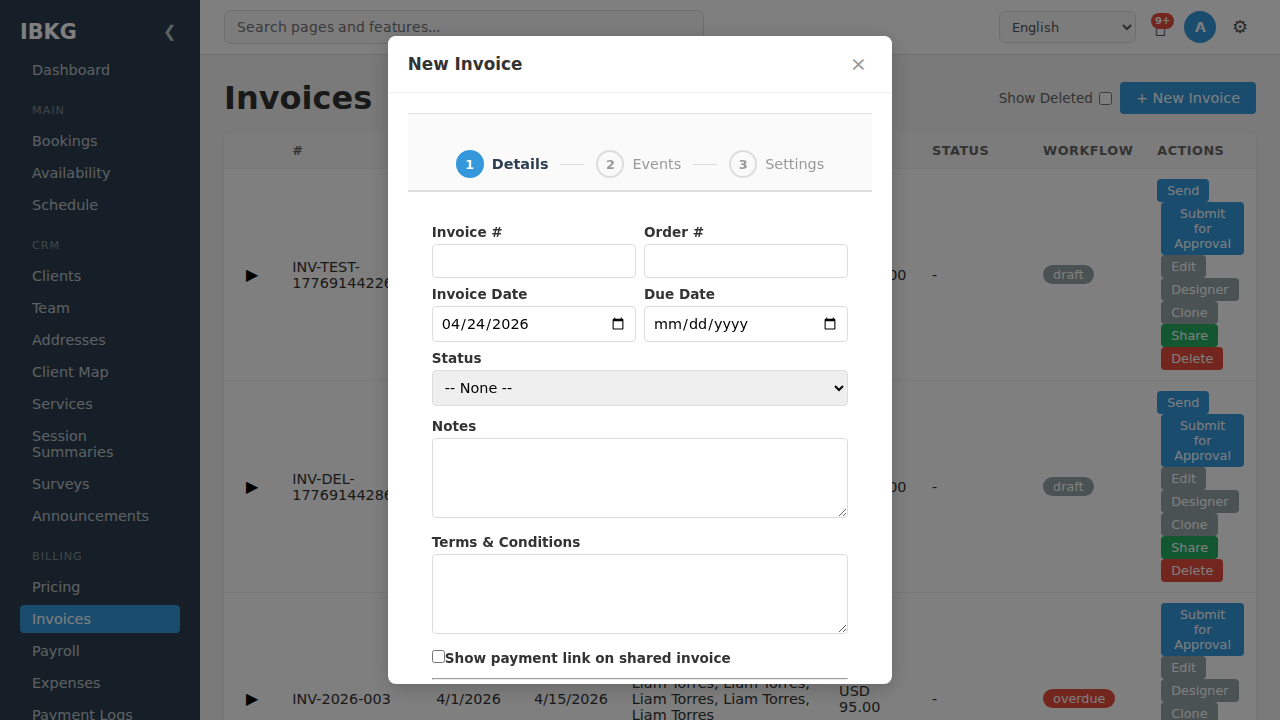
Fill in:
- Invoice # - unique identifier. Use your own numbering scheme (e.g.
INV-2026-100,2026-001, or any text). - Order # - optional reference to a PO or external order number.
- Invoice Date - defaults to today. Change if the invoice is backdated.
- Due Date - when payment is expected. 30 days is typical.
- Status - optional; pick from your configured invoice statuses if you have any set up.
- Notes - text shown to the client on the invoice.
- Terms & Conditions - cancellation policy, late fees, legal language.
- Show payment link on shared invoice - tick this if you want clients to pay online via the share link.
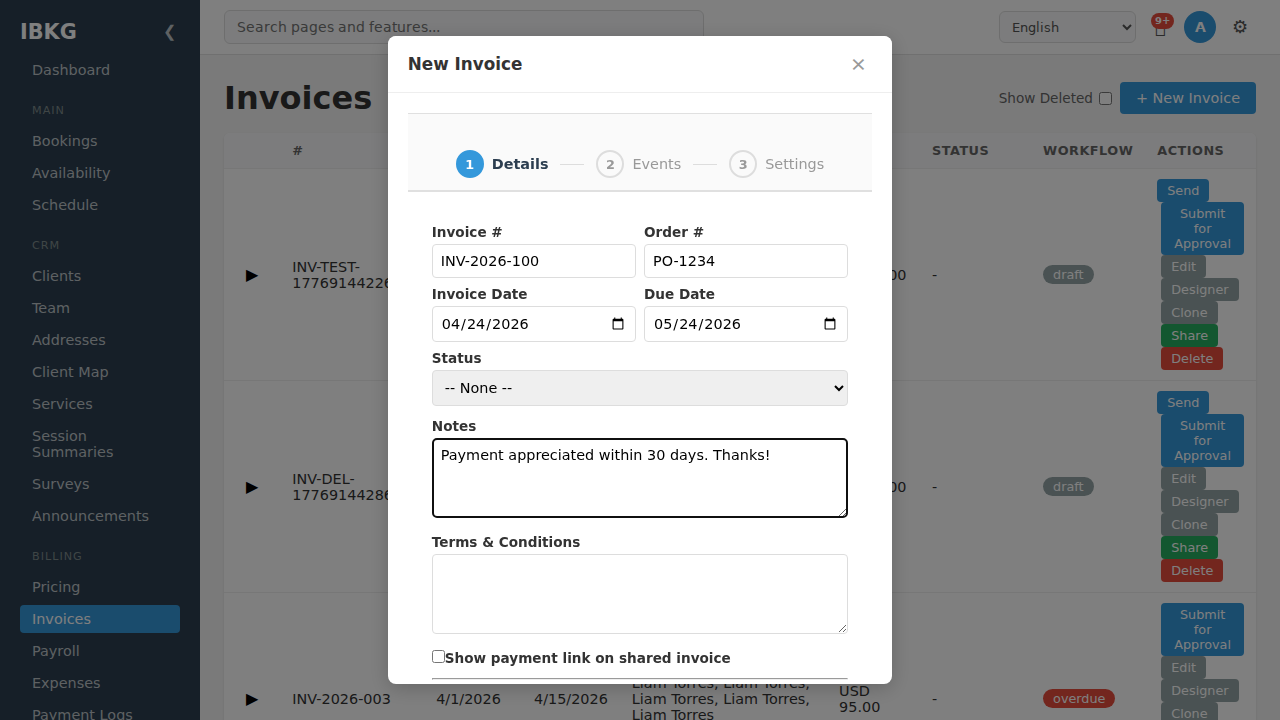
Click Next to continue.
3. Step 2 - Events (optional auto-fill)
The Events step lets you pull sessions from the calendar into the invoice as line items automatically:
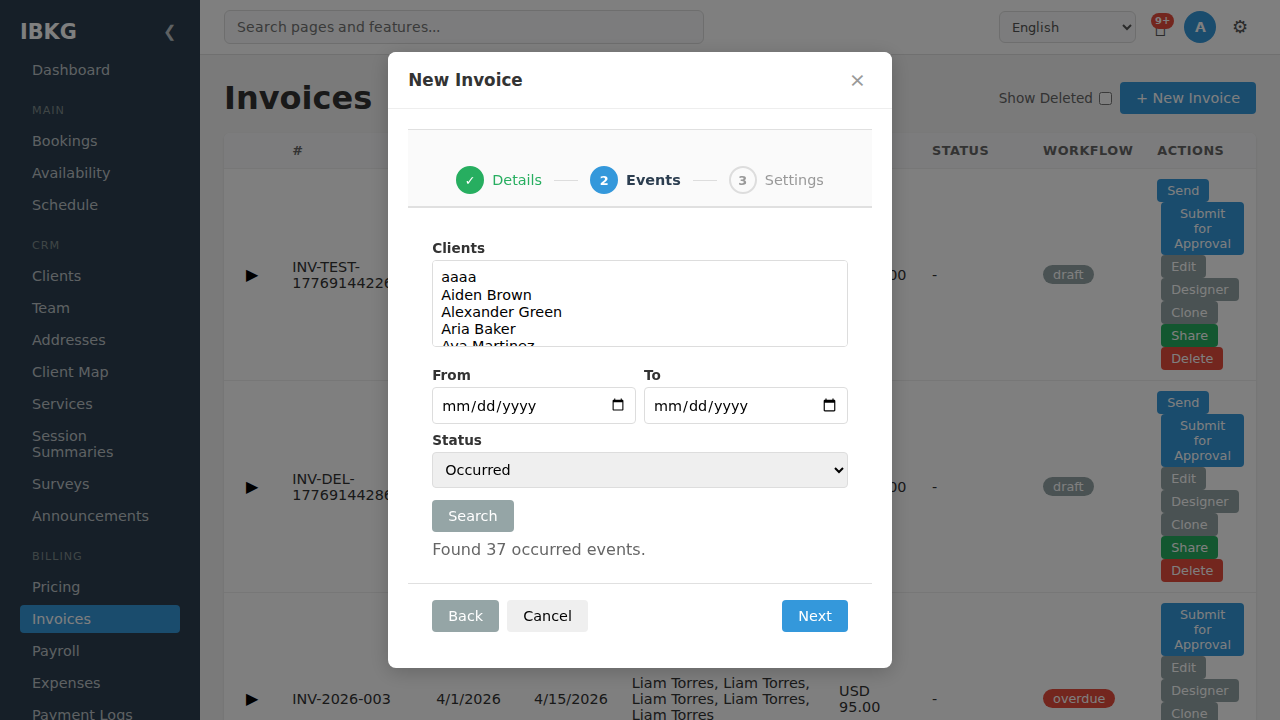
How it works:
- Select one or more Clients from the list.
- Pick a From and To date range.
- Choose the Status to filter by (defaults to
Occurred- sessions that actually happened). - Click Search.
FoxCLM finds every matching session and counts them ("Found 37 occurred events" in the example above). When you save the invoice, each session becomes a line item with its date, duration, fee, and any attached fees expanded.
If you want to invoice without pulling sessions (e.g. a manual retainer bill), skip this step - just click Next without selecting anything.
4. Step 3 - Settings
The final step sets global invoice parameters:
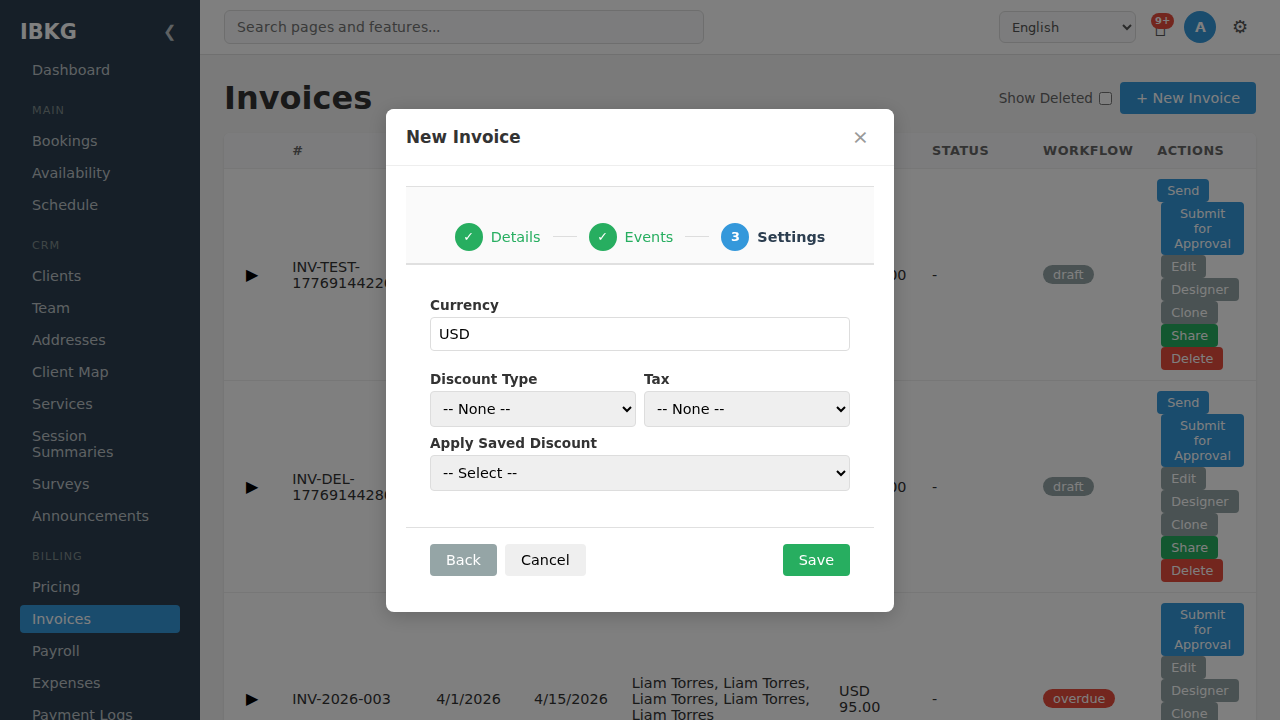
- Currency - 3-letter code:
USD,EUR,GBP,MYR,CNY, etc. This controls what symbol appears and which Stripe payment methods are available (see Payments for the currency-method matrix). - Discount Type - None, Fixed amount, or Percentage. Applied to the invoice total.
- Tax - None, or pick from your configured tax types (set up in Settings -> Tax Types).
- Apply Saved Discount - if you have predefined discount rules (e.g. "10% loyalty discount"), pick one here.
Click Save when you're ready.
5. What happens next
After saving, FoxCLM:
- Creates the invoice in
Draftstatus. - Generates line items from the sessions you selected in Step 2 (if any).
- Attaches the clients you picked so the invoice has recipients on file.
- Returns you to the Invoices list with the new invoice at the top.
From the list, use the action buttons to:
- Edit - open the full editor to add or modify line items manually
- Designer - customise the visual layout (fonts, colours, branding)
- Send - email the invoice to the linked clients
- Submit for Approval - route to an admin for sign-off (if you've enabled Invoice Approval Lock)
- Share - generate a public URL for the client to view and pay
- Clone - duplicate as a starting point for a similar invoice
- Delete - soft-delete (recoverable from Recycle Bin)
Tips
- Set a default currency in your Business Profile so you don't have to change it every time.
- Use invoice number prefixes with the year (e.g.
INV-2026-) to keep them sortable. - Tick "Show payment link" for clients you want paying online; leave off for in-person payments.
- Clone similar invoices rather than filling the wizard from scratch every time.
What's next
- Billing from Sessions - deep dive on auto-generating line items
- Invoice Workflow - set up approvals, auto-reminders, and overdue automation
- Invoice Designer - make your invoices look on-brand
- Payments - accept online payment via Alipay / WeChat Pay