
Appearance
Your First Contract
This tutorial walks through the full contract lifecycle from creation to activation. You'll use a template to start, add parties, route through approval, send for e-signature, and see the contract become Active. Takes about 8 minutes.
Prerequisites: sample data loaded (see the Contract Templates section in the sidebar should show 5 templates). No other setup required.
1. Open the Contracts page
Click Contracts in the sidebar.
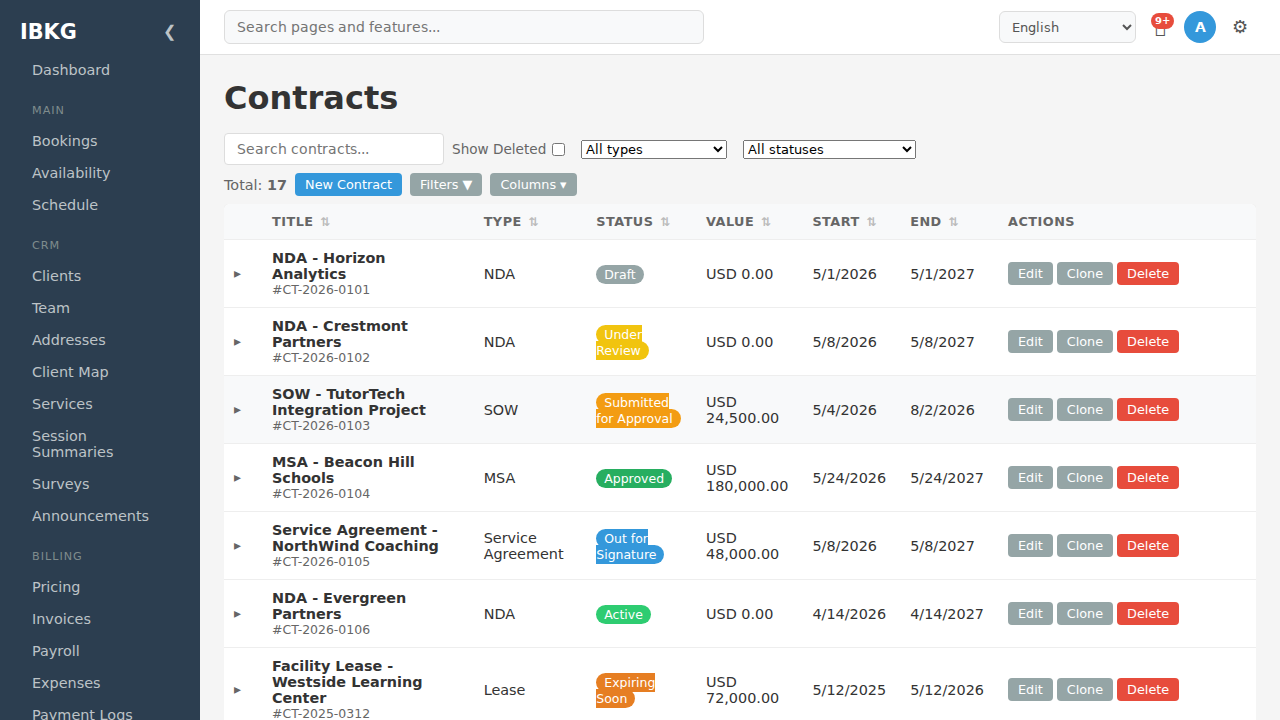
You see the seeded list: NDAs, MSAs, SOWs, Service Agreements, leases - each with its status badge. Click New Contract at the top.
2. Fill in the creation modal
The modal asks for:
- Title - e.g. "NDA - Horizon Analytics"
- Type - NDA
- Number - auto-suggested (e.g.
CT-2026-0101) - Template - pick Standard Mutual NDA
- Value / Currency - leave blank for an NDA
- Start / End date - typical NDA is 1 year; pick today and today+365
- Auto-renew - optional
Click Create. The contract lands in the editor in Draft status.
3. Review Details
The Details tab is pre-filled from the template:
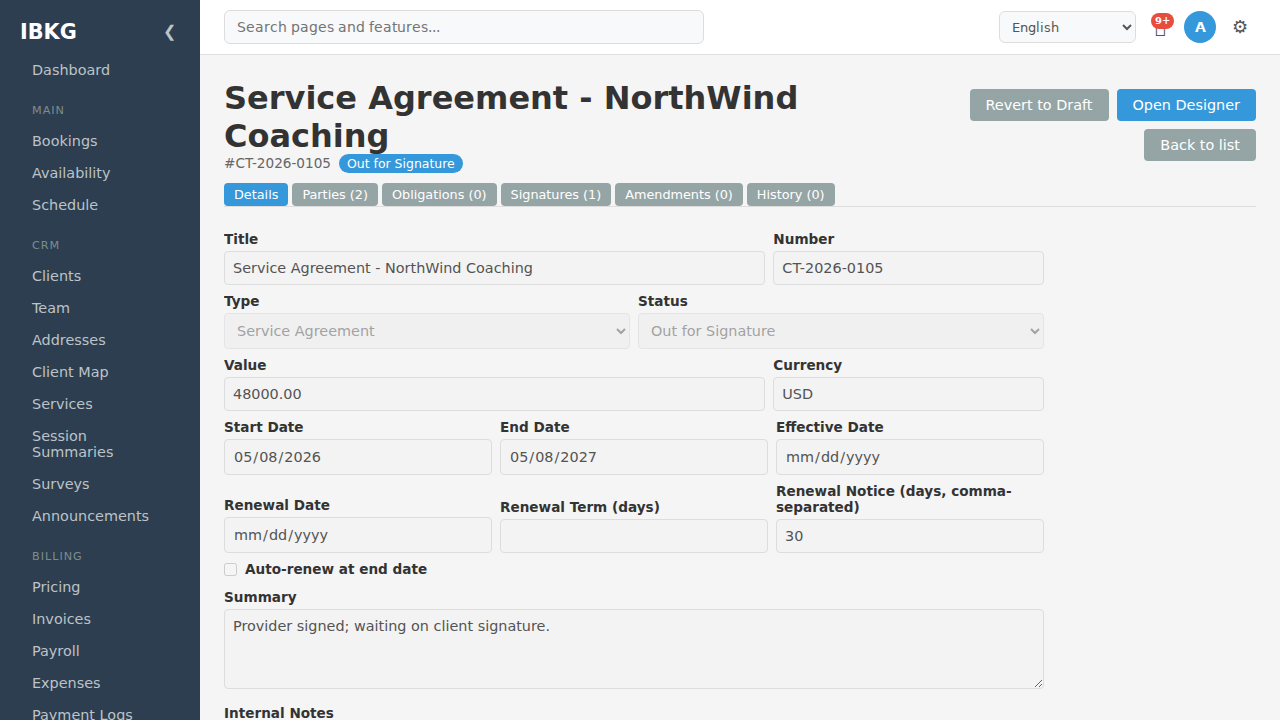
Set optional fields:
- Renewal Notice (days, comma-separated):
30for a single 30-day warning, or60,30,14for escalating reminders - Summary - short description
- Internal Notes - private comments
Click Save (when in Draft, changes save automatically on each field blur).
4. Add parties
Click the Parties tab.
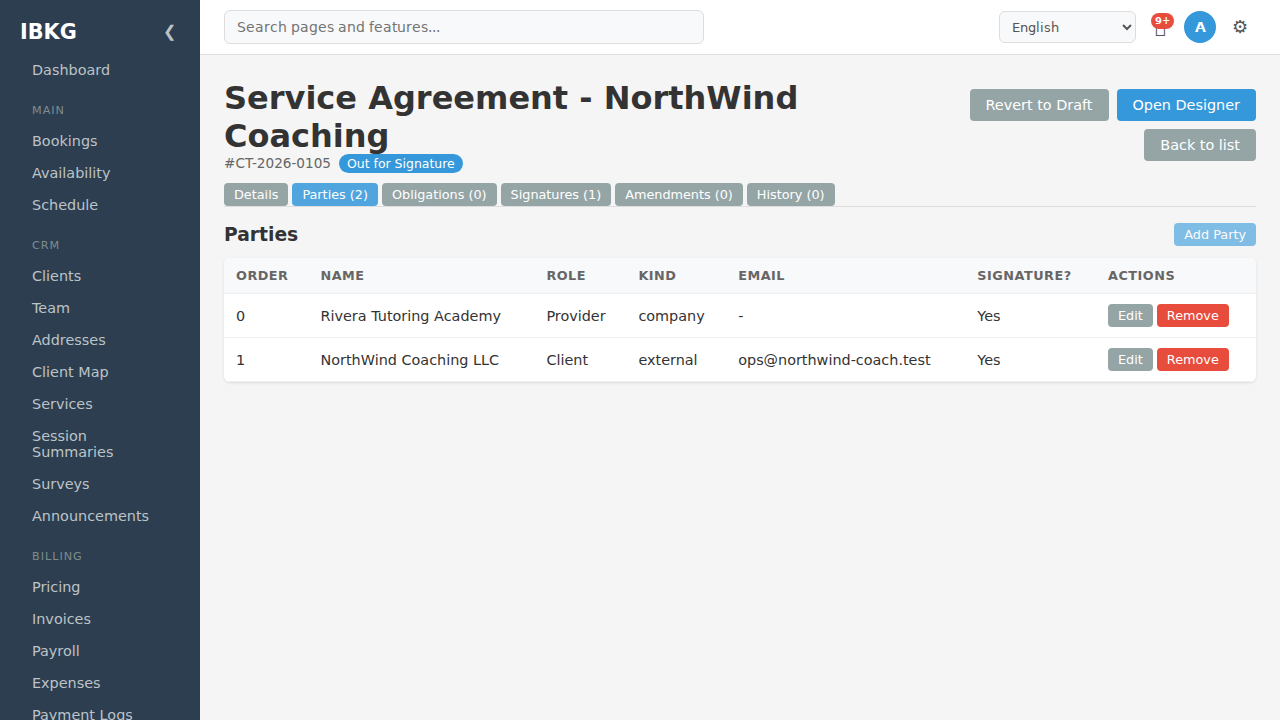
Two parties are already there (from the template, if you used one with default parties). If empty, click Add Party for each:
Party 1 - Your side:
- Kind:
company - Display name: (your business name)
- Role: Provider
- Signing order: 0
- Requires signature: on
Party 2 - Counterparty:
- Kind:
external - Display name: Horizon Analytics LLC
- External email: signatory@horizon.test
- Role: Client
- Signing order: 1
- Requires signature: on
Save each party.
5. Customise content (optional)
Click Open Designer at the top-right to open the visual editor:
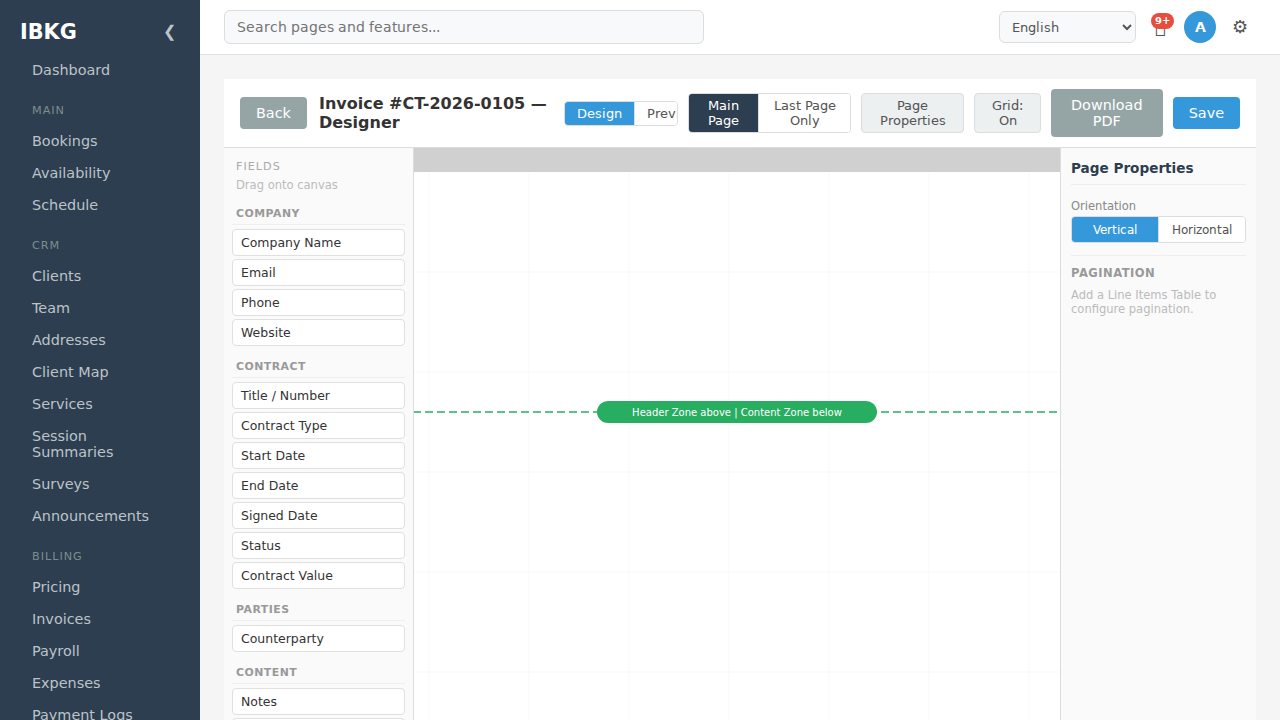
The template already provides the NDA boilerplate. Drag fields (Title / Number, Start Date, etc.) from the left panel if you want them repositioned. Add or remove clauses via the Edit HTML mode.
When done, click Save and then Back to return to the editor.
6. Submit for approval
Back on the Details tab, click Submit for Approval in the top bar.
- Status moves to
Submitted for Approval - The editor locks (you'll see a padlock-like state on input fields)
- An email fires to the workspace owner
If you're both submitter and approver (solo business), you'll see both Approve and Reject buttons next to Revert to Draft.
7. Approve
Click Approve.
- Status moves to
Approved - Approval is recorded in the History tab
The contract is now ready to send.
8. Send for signature
Click Send for Signature.
FoxCLM:
- Generates a unique share token
- Moves the contract to
Out for Signature - Fires the
share_contractworkflow action (if configured) - Emails each party with
requires_signature: ona link:https://your-viewer-host/sign/<token>?party=<party_id>
Click the Signatures tab to see generated signing links (copy the URL for party 1 / party 2 if you want to test locally).
9. The public signing page
Open your signing link in an incognito window (or share it with the counterparty):
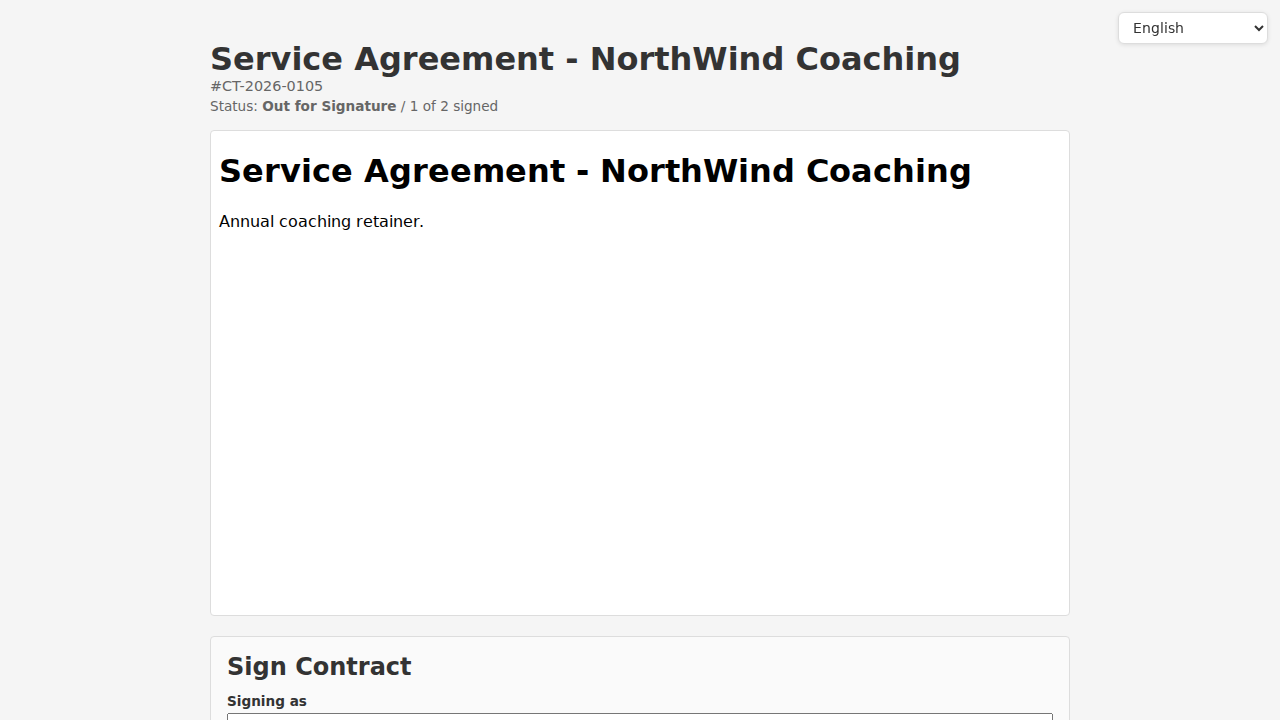
The page shows:
- Contract title and number
- Status (
Out for Signature) and signed count ("0 of 2 signed") - Contract body below
Scroll down to the Sign Contract form:
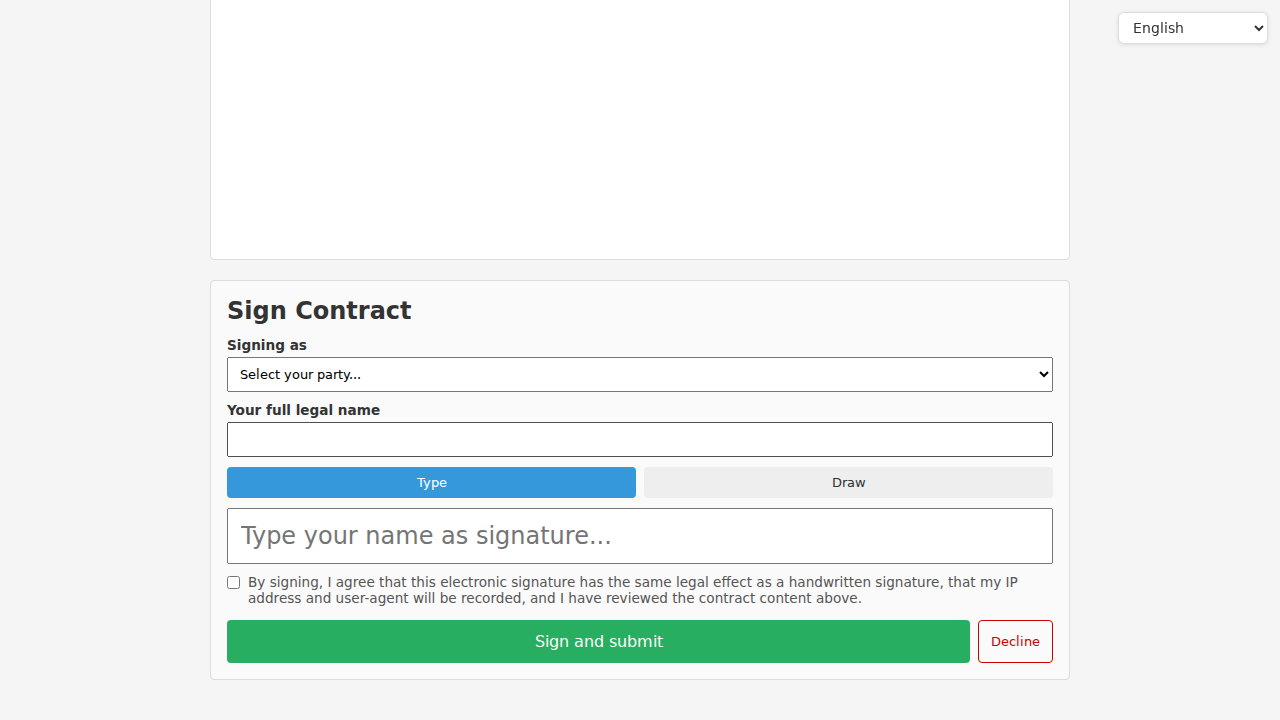
- Signer picks their party (auto-selected from the URL)
- Enters full legal name
- Picks Type (name as styled text) or Draw (canvas pad)
- Ticks the legal acknowledgement checkbox
- Clicks Sign and submit
The page reloads: "Signed! 1 of 2 signed". Repeat for the counterparty's link.
10. The contract activates
When both parties have signed:
- FoxCLM sets
signed_aton the contract - A workflow transition
Out for Signature -> Activewith conditionsigned_at is_not_nullfires - Status badge turns green (
Active)
Back in the admin UI, the Signatures tab now shows both signatures with signer name, type, timestamp, and IP address.
The History tab records the whole arc:
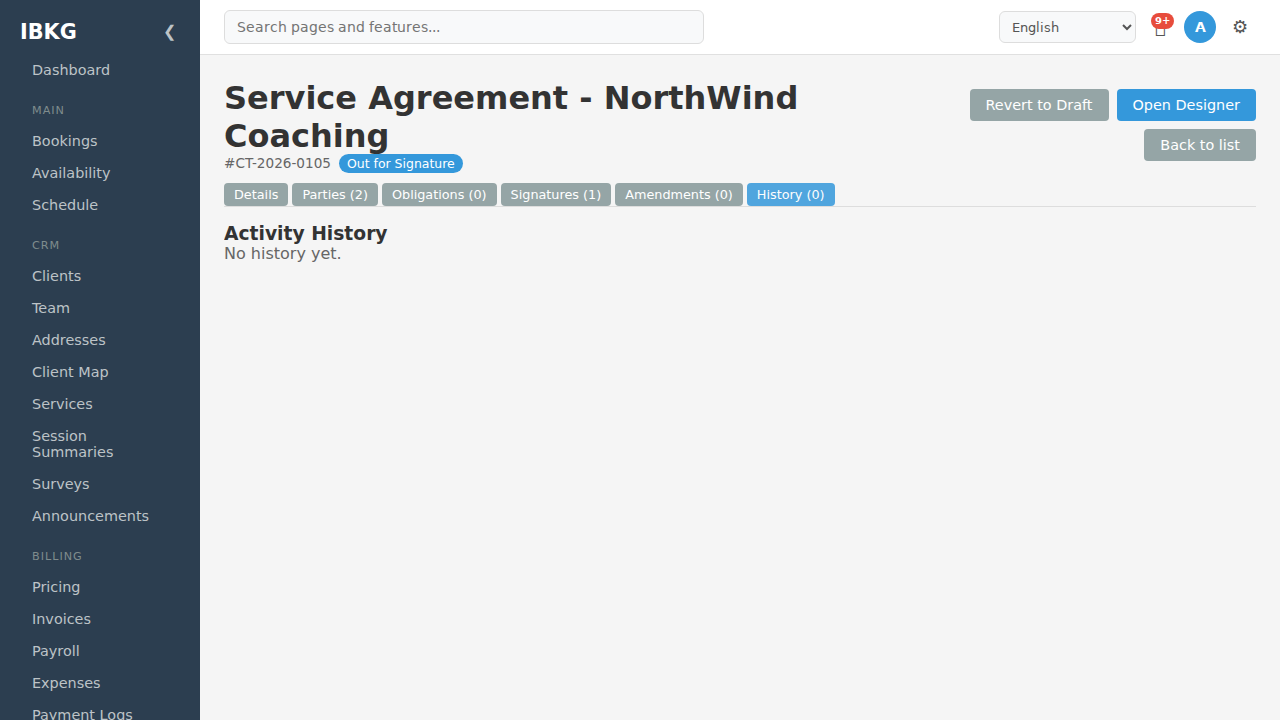
Every status change, every action, every signer.
11. What happens next
If the template had a default obligation schedule:
- Obligations auto-generate (e.g. "Counterparty COI" due in 14 days, "First invoice cycle" due in 30)
- They appear on the Obligations tab and in the workspace-wide Contract Obligations page
If auto-renew is on and the end date passes: FoxCLM extends the end date by renewal_term_days and transitions to Renewed.
Otherwise, you manage renewal manually by clicking Amend (to create a linked amendment) or waiting for Expiring Soon to trigger renewal warnings.
Tips
- Always add a signing order even if it's nominal (0, 1). It controls how parties appear on the signing page.
- Pick Typed signatures when parties are technically unsophisticated - drawing on a desktop is awkward and people miss the draw control.
- Use the template's default obligations whenever you can. Manually adding the same five obligations to every new contract is wasted work.
- Watch the History tab. It's your audit trail for disputes, compliance audits, or just "who approved this, when?".
What's next
- Templates & Clauses - set up your own templates
- Amendments & Renewals - modify over time
- Obligations - track post-signing commitments