
Appearance
Inviting a Collaborator
Collaborators are people who help you run the business - co-owners, assistants, accountants, or partners. Each collaborator logs in with their own account and can switch into your workspace with the permissions you grant.
This tutorial walks through inviting your first collaborator. Takes about 4 minutes.
1. Open the Team page
Click Team in the sidebar (under CRM).
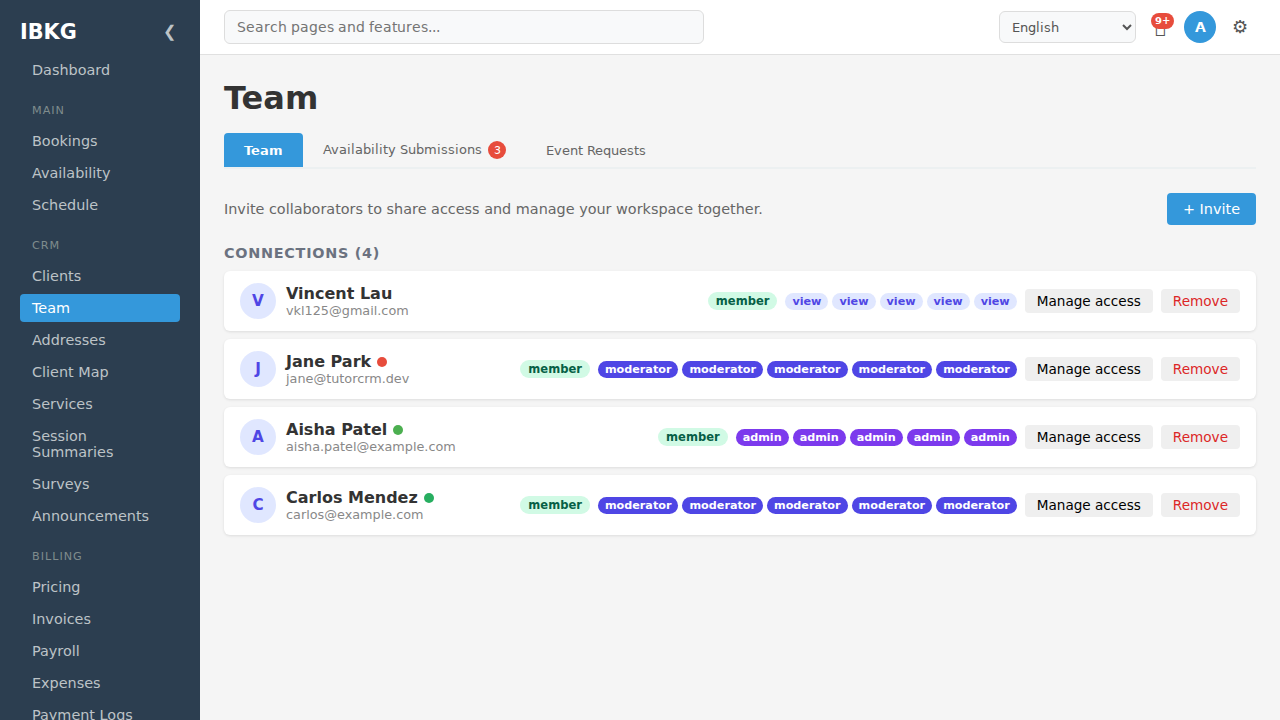
The Team page has three tabs:
- Team - your collaborators and their permissions (where we are)
- Availability Submissions - staff weekly availability pending your review (red badge shows count)
- Event Requests - staff-requested session cancellations and reschedules
The Team tab shows every connected collaborator with:
- Avatar - first letter of their name on a coloured background
- Name and email - with a status dot (green = online, red = offline, grey = never logged in)
- Member badge - green "member" pill if they also have staff payroll enabled
- Permission pills - five badges showing their level (view / moderator / admin) on each resource (Calendar, Clients, Invoices, Workflows, Webhooks), left to right
- Manage access - edit their permissions
- Remove - revoke all access
Click + Invite at the top right.
2. The invite form
The invite form expands below the button:
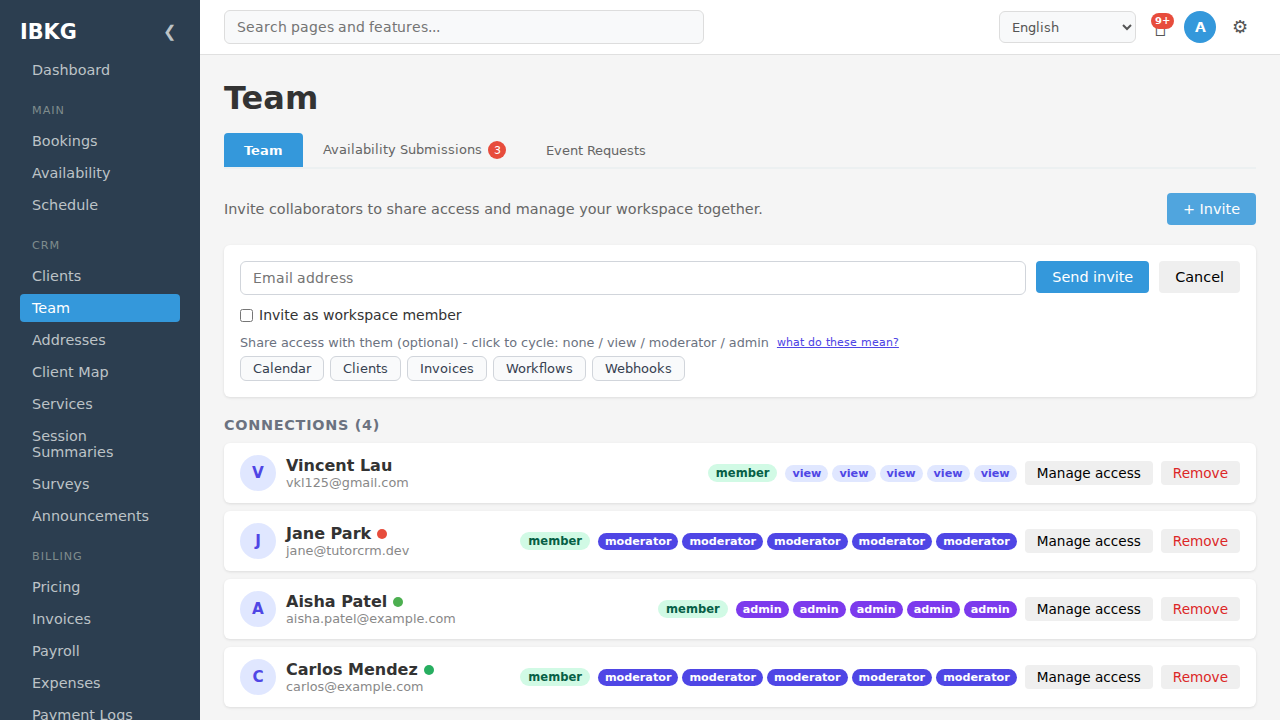
Fields:
- Email address (required) - where to send the invitation
- Invite as workspace member checkbox - also enables staff payroll for this person
- Permission pills - click each resource to cycle through:
none -> view -> moderator -> admin -> none
What each resource controls
| Resource | Access includes |
|---|---|
| Calendar | Sessions, scheduling, bookings, availability |
| Clients | Client records, custom fields, addresses |
| Invoices | Invoice creation, editing, sending, payments |
| Workflows | Statuses, transitions, actions, automation settings |
| Webhooks | Webhook configs and API keys |
What each level means
| Level | Read | Write (edit/create) | Delete |
|---|---|---|---|
view | Yes | No | No |
moderator | Yes | Yes | No |
admin | Yes | Yes | Yes |
If a level is none, the collaborator can't see that resource at all - the sidebar link is hidden.
3. Add payroll details (optional)
If this collaborator is also a paid worker (not just a partner who reviews things), tick Invite as workspace member to add payroll tracking:
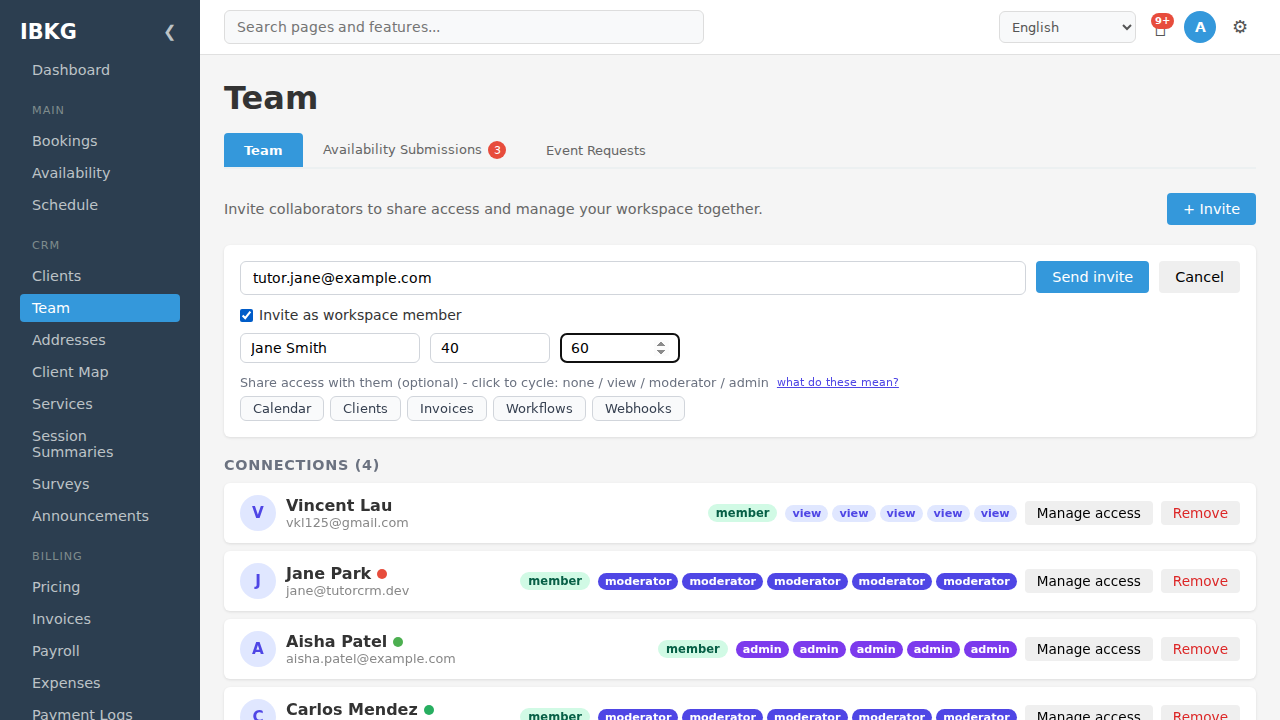
Three rate fields appear:
- Display name - shown on payroll statements (defaults to their full name)
- Hourly rate ($) - multiplied by total hours worked
- Session rate ($) - flat fee per assigned session
Rates combine - someone with $40 hourly and $60 per session would earn both for each session (see Payroll for the full calculation).
You can also click the resource pills to pre-configure permissions. Clicking cycles through the levels:
- First click: view
- Second click: moderator
- Third click: admin
- Fourth click: back to none
For a tutor who teaches their own classes, reasonable defaults are:
- Calendar: moderator (create and edit their sessions)
- Clients: view (read client details, but not add or delete)
- Invoices, Workflows, Webhooks: none (they don't need these)
4. Send the invite
Click Send invite. Two scenarios:
If the invitee has a FoxCLM account
FoxCLM creates a pending connection. Next time they log in, they see a notification: "X wants to connect". They can Accept, Decline, or Block.
- Accept - the connection activates and your workspace appears in their workspace switcher with the permissions you granted.
- Decline - silent rejection; you see "declined" on your end.
- Block - prevents any future invites from you.
If the invitee doesn't have a FoxCLM account
FoxCLM emails them a claim link (valid 7 days). They click the link, create an account, and your workspace connection activates automatically.
You can see pending invites under the Sent invitations section on the Team page. Cancel any time before they're accepted.
5. What happens next
Once the collaborator accepts:
- Their name appears under Connections with the permissions you granted
- They can log in, switch to your workspace, and see only what you've allowed
- You can change their permissions at any time - click the permission pill to cycle levels
- You can promote or demote them, or revoke access entirely with Remove
Common setups
Co-founder / equal partner - admin on all five resources.
Accountant - admin on Invoices, view on Clients, none on others. They can manage billing without touching sessions.
Teaching assistant - moderator on Calendar, view on Clients, with workspace member enabled for payroll.
External developer / integrator - admin on Webhooks only. They can set up integrations without seeing business data.
What's next
- Team Overview - the full staff vs. collaborators explanation
- Payroll - calculate pay for staff
- Staff Portal - what a worker-level person sees after logging in