
Appearance
Setting Up Custom Fields
Custom fields let you capture any data FoxCLM doesn't have out of the box - school year, membership tier, emergency contacts, medical notes, referral source, anything specific to your business. They show up automatically in the relevant edit modals and can drive workflow conditions.
This tutorial walks through adding custom fields to clients, sessions, and invoices. Takes about 5 minutes.
1. Open the Custom Fields page
Click Custom Fields in the sidebar (under AI TOOLS).
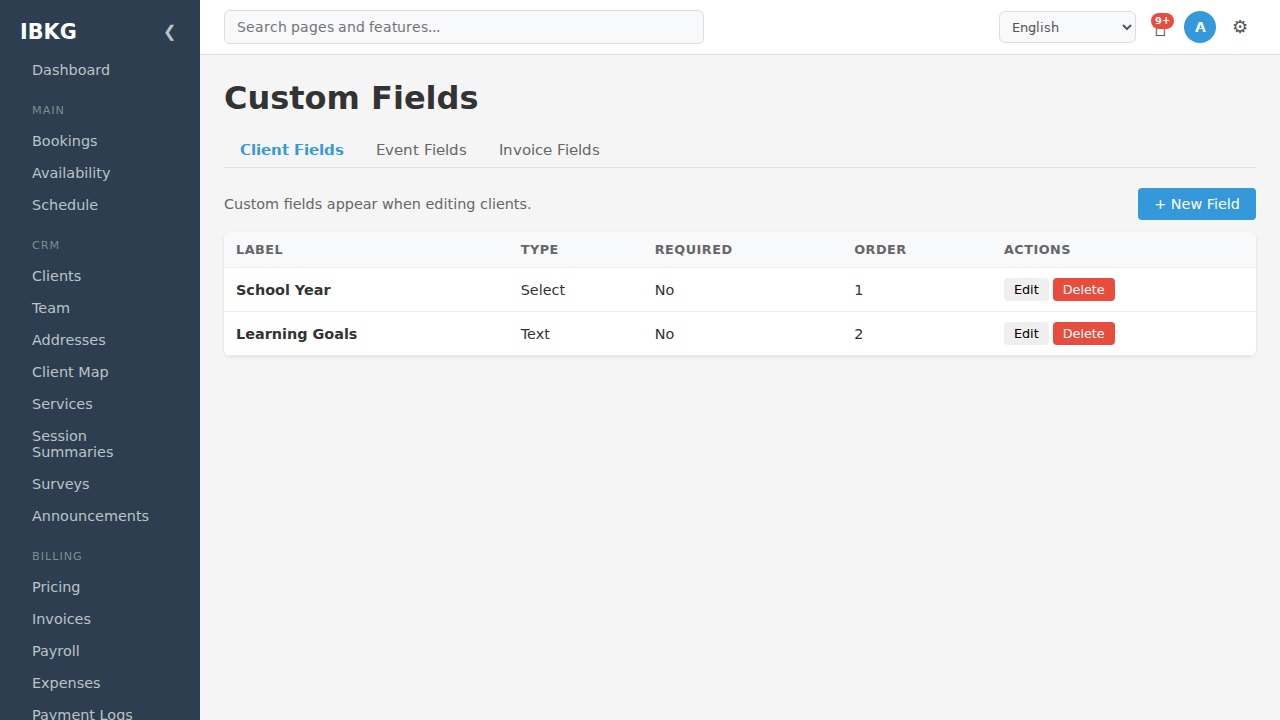
The page has three tabs:
- Client Fields - appear when editing a client
- Event Fields - appear when editing a session
- Invoice Fields - appear when editing an invoice
Each tab lists the existing fields with their Label, Type, Required flag, Order, and action buttons. The seeded examples show School Year (Select type) and Learning Goals (Text type) on clients.
Click + New Field in the top right.
2. The new field modal
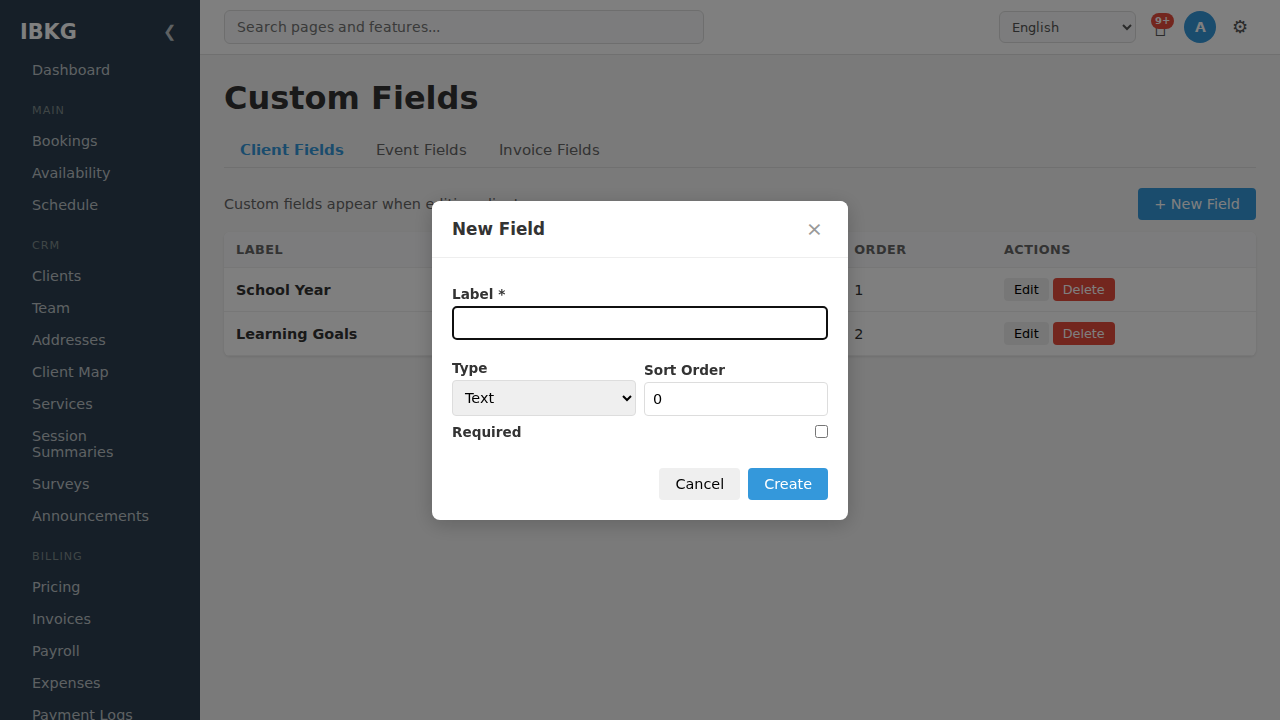
Fields:
- Label (required) - the field name users see (e.g. "School Year", "Emergency Contact")
- Type - one of:
- Text - single or multi-line free text
- Number - numeric value
- Date - calendar date picker
- Select (dropdown) - pick from a predefined list
- Sort Order - position in the form (lower = higher)
- Options - for select fields only, one option per line
- Required - if checked, the record can't be saved without a value
3. Adding a text field
The simplest case: a free-form text field.
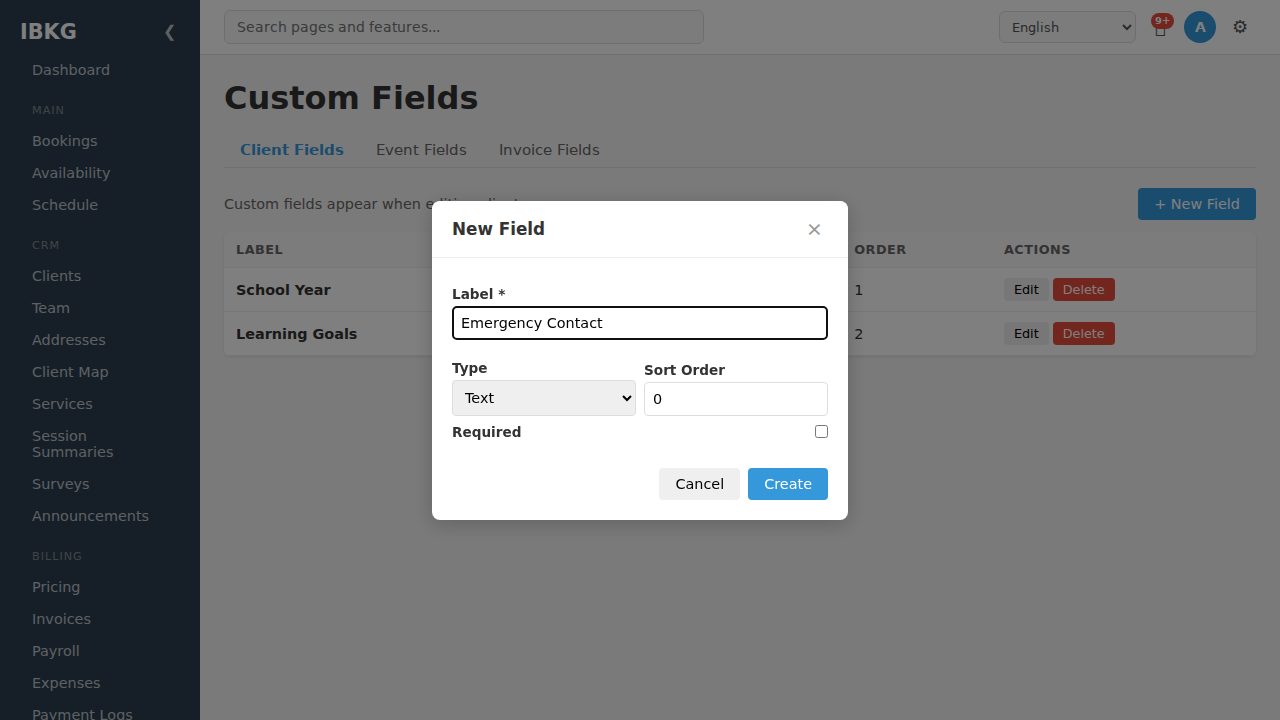
Example: "Emergency Contact" as a text field that captures a name and phone number as a single string. Clients can't be saved without it if you tick Required.
Text fields work for:
- Notes
- Emergency contacts
- Referral source
- Medical conditions
- Anything that doesn't fit a number, date, or predefined list
4. Adding a select (dropdown) field
For values where the options are known upfront, use a select field:
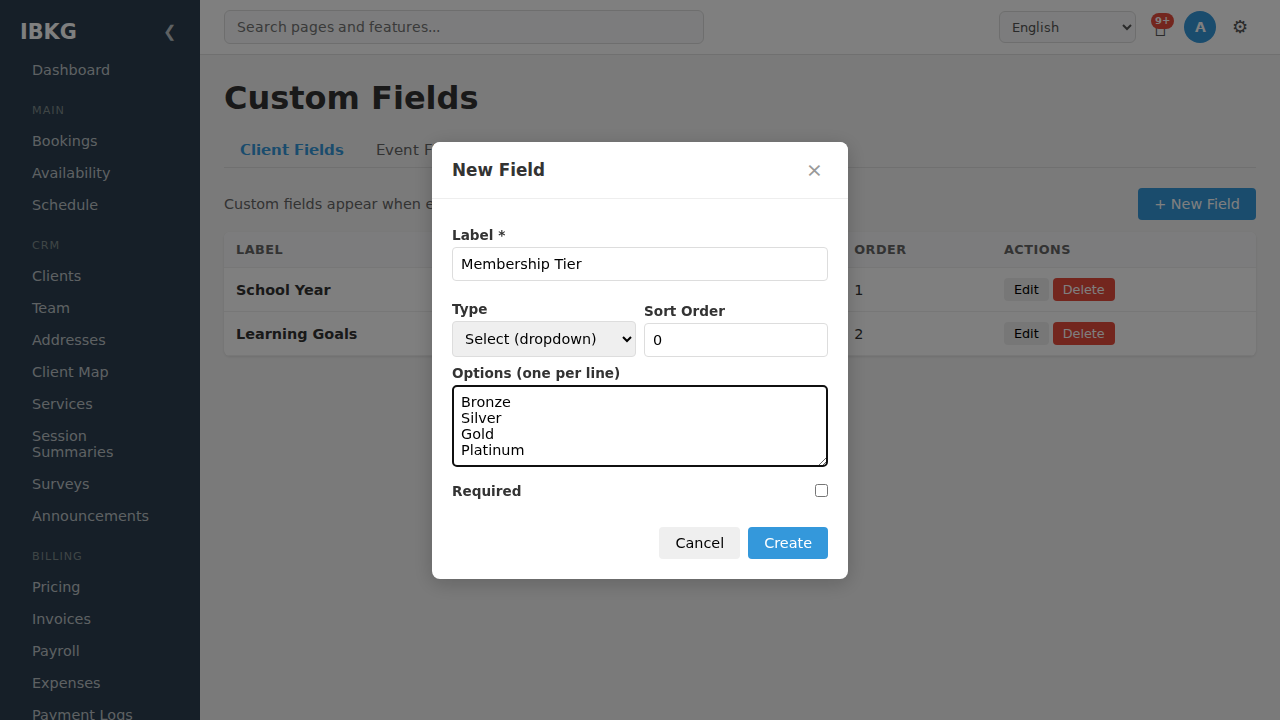
Example: "Membership Tier" with four options - Bronze, Silver, Gold, Platinum - one per line.
Select fields have two advantages over text:
- Consistency - users can't typo "Golld" or "gold " (with trailing space)
- Filterable - you can reliably filter and report on known values
Use select for:
- Membership levels
- Class size preference (1-on-1, Small group, Large group)
- Skill level (Beginner, Intermediate, Advanced)
- Delivery method (In-person, Online, Hybrid)
5. Save
Click Create. The field appears in the list immediately and shows up in the relevant edit modal (Client edit, Session edit, or Invoice edit) for every record going forward.
Existing records get the new field too - they just have no value yet. Edit and save them to populate.
6. Where fields appear
In the edit modal
Every client edit modal shows all Client Fields at the bottom under a Custom Fields section. Same for sessions and invoices.
In workflow conditions
Custom fields can drive automation. Example: "When a client's membership_tier equals Platinum, fire the send_welcome_email action with a premium template."
Build conditions at Workflow -> pick a transition -> add a condition with the custom field as the left-hand side. See Your First Workflow for the condition editor reference.
In email action bodies
Custom email action bodies can reference custom field values with placeholders like:
Hello {{fname}},

Your {{custom.membership_tier}} membership expires on {{custom.expires_at}}.
In webhook payloads
Same placeholder syntax works in webhook payload templates.
In the invoice designer
Drag any custom field onto your invoice template. Great for custom references, PO numbers, or contract IDs that need to appear on the invoice.
7. Editing and removing fields
Edit
Click Edit next to any field. You can change the label, type, order, and required flag. Existing values are preserved (converted if the type changes, blanked if the type is incompatible).
Delete
Click Delete to remove a field. This also deletes all values stored in it across every record. FoxCLM asks for confirmation.
If you want to keep the data but hide the field from the UI, consider archiving instead (not currently supported - use a "z-deprecated" prefix in the label and move to the bottom of the sort order).
8. Which entity to target
| Field should live on | Example | Tab |
|---|---|---|
| Per-client info | Emergency contact, membership tier, allergies | Client Fields |
| Per-session info | Topic covered, homework assigned, attendance notes | Event Fields |
| Per-invoice info | PO number, project code, contract ref | Invoice Fields |
If you're not sure, ask "does this change per X?" If it changes per session (e.g. homework), it's an Event field. If it stays the same for the client over many sessions (e.g. emergency contact), it's a Client field.
Tips
- Don't over-engineer. Start with 3-5 fields and add more when you find yourself putting info in the notes field repeatedly.
- Prefer select over text when the set of values is known. Consistent values unlock reliable filtering and workflow conditions.
- Use
Requiredsparingly. Required fields block saves and frustrate collaborators who don't have the info yet. Better to leave optional and use a workflow to chase the missing data. - Order fields by frequency of use. Most-edited fields first; one-off notes at the bottom.
What's next
- Custom Fields reference - more detail and edge cases
- Your First Workflow - use custom fields in conditions
- Adding Your First Client - see custom fields in action on a client record