Appearance
Designing a Custom Invoice Template
The invoice designer is a drag-and-drop tool for controlling exactly how your invoices look. Drop company info, invoice details, client blocks, line item tables, and custom fields onto a canvas - position and style them freely. This tutorial walks through the interface.
Takes about 5 minutes.
Prerequisites: an existing invoice to design. See Your First Invoice if you don't have one yet.
1. Open the designer
From the Invoices page, each row has a Designer button in the Actions column:
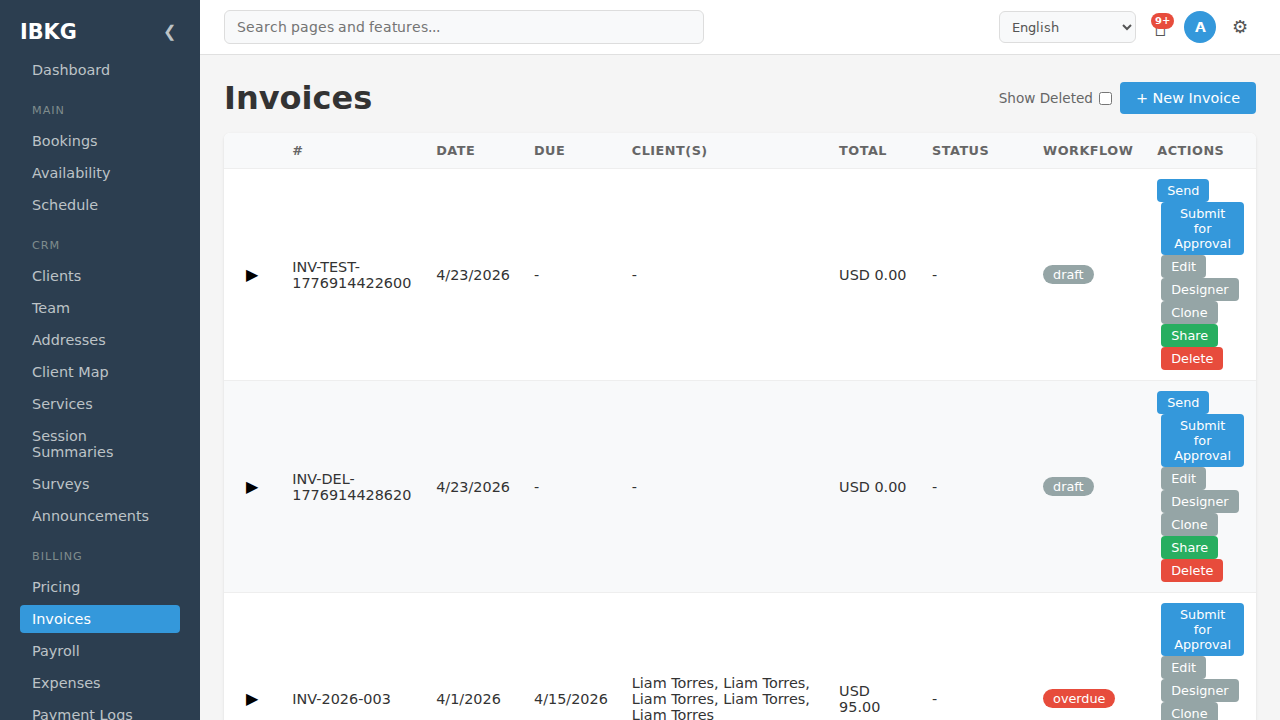
Click Designer on any invoice. The designer opens full-screen.
You can also open the designer from inside the invoice editor - click Design after saving.
2. The designer layout
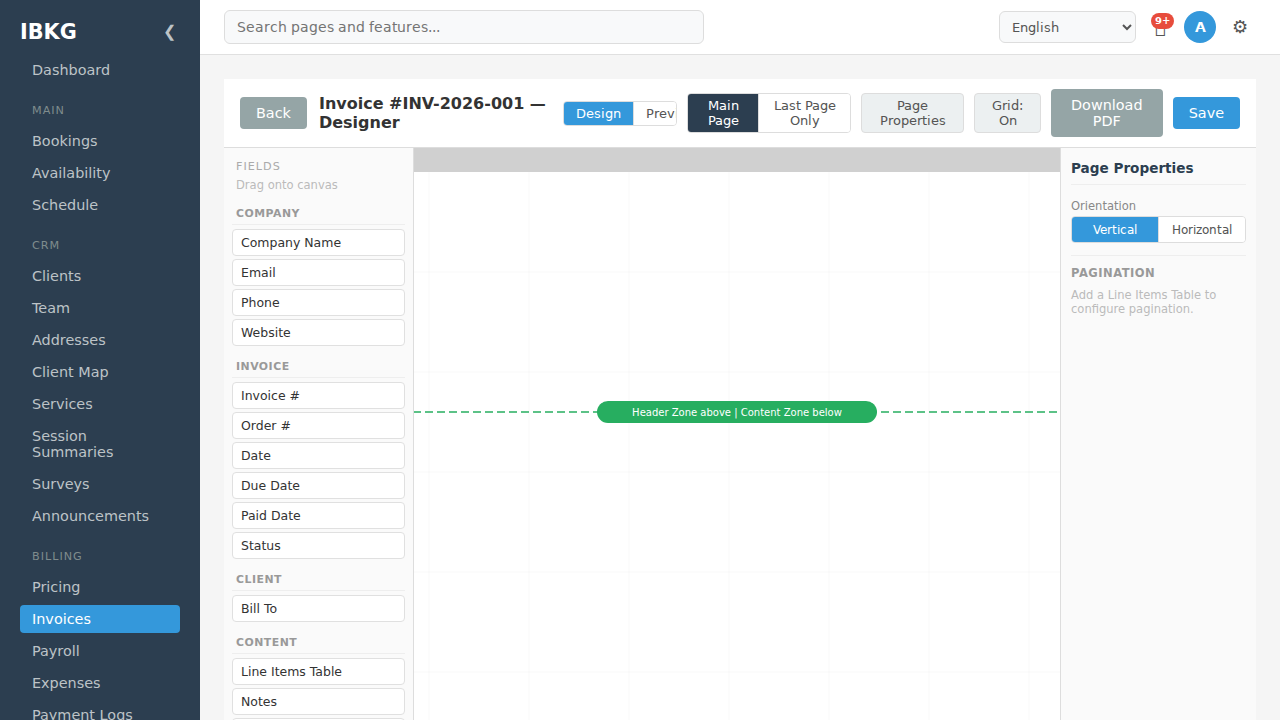
The designer has three main regions:
Top bar (horizontal)
- Back - return to the invoice editor without saving
- Invoice #xxx - Designer - the invoice you're editing
- Design / Preview / Download - a segmented control: switch to design mode, preview with real data, or download the rendered PDF
- Save / Undo / Redo / Auto-layout - save the design, step through edit history, or drop in a canonical starter layout
- Page Properties - opens the right-hand panel (orientation, grid, page-repeat, pagination)
Left sidebar: Fields panel
Draggable field chips grouped by category:
COMPANY (pulled from your Business Profile)
- Company Name
- Phone
- Website
INVOICE
- Invoice # - your invoice number
- Order # - reference order / PO number
- Date - issued date
- Due Date - payment deadline
- Paid Date - when paid (empty until paid)
- Status - workflow state
CLIENT
- Bill To - linked client's name and address block
CONTENT
- Line Items Table - the full items table with columns
- Notes - free-form notes block
- Terms & Conditions - T&C block
- Footer - repeating footer on every page
- Page Number - page X of Y
Main canvas
A grid-lined design area. The green dashed line divides the page:
- Header Zone above - content here repeats on every page
- Content Zone below - content here flows across pages as needed
Drag fields from the left panel onto either zone. Once placed, click a field to select it; drag it to move; drag corners to resize.
Right sidebar: Page Properties
Context-dependent. When nothing is selected, it shows page-level options:
- Orientation - Vertical (portrait) or Horizontal (landscape)
- Pagination - how the line items table flows across pages (auto-configured once you drop a Line Items Table)
When a field is selected, the right sidebar switches to show that field's properties - font, colour, size, alignment, padding, borders.
3. More fields below
Scroll the Fields panel to see the full list:
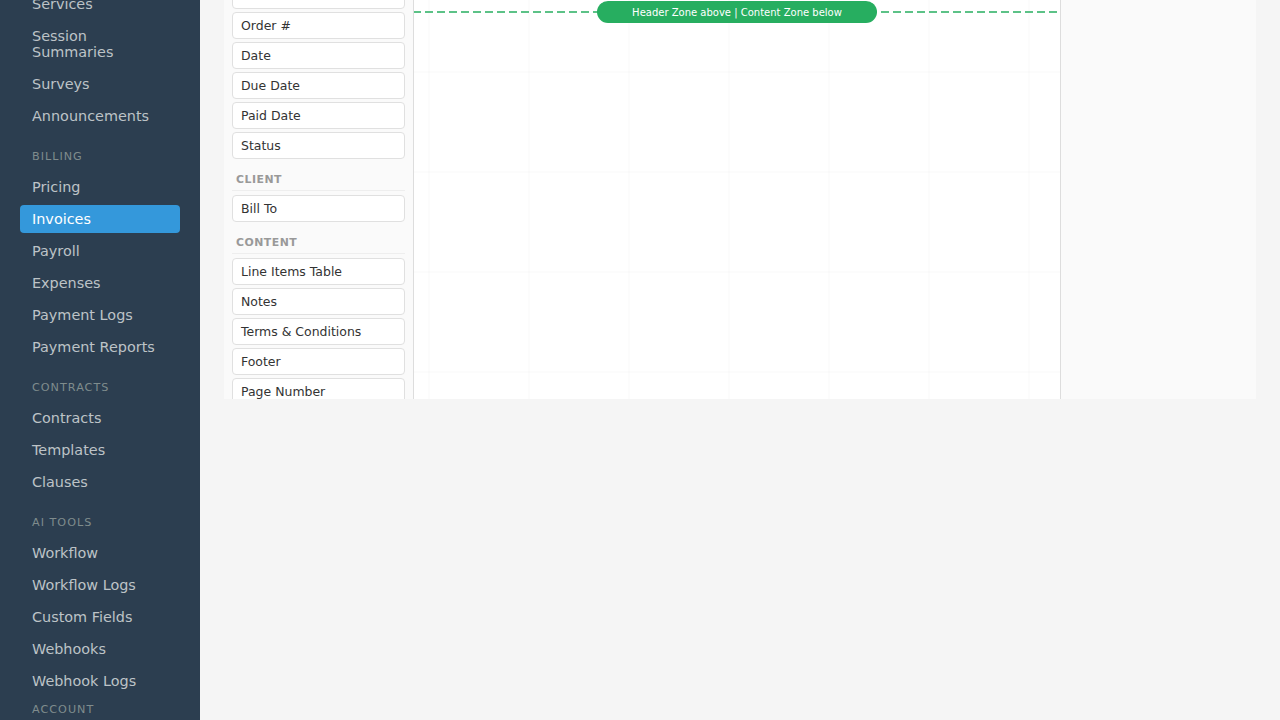
Additional categories include a Totals group (Subtotal, Discount, Tax, Grand Total, Balance Due, Total), Custom Fields (any fields you've defined for invoices), and visual elements like text labels, images, signatures, and watermarks.
4. Drop fields onto the canvas
Click and drag a chip from the left panel onto the canvas.
Example layout for a typical invoice:
Header Zone (top of page):
- Company Name (large, top-left)
- Logo (top-right)
- Company Email, Phone, Website (below company name)
Content Zone (main body):
- Invoice # (large header, centered)
- Date / Due Date (beside invoice #)
- Bill To (client block, top-left of body)
- Line Items Table (fills most of the body)
- Notes (below the table)
- Terms & Conditions (at the bottom)
Pinned to the last page:
- Totals block (subtotal, discount, tax, total)
- Signature block
- Footer with Page Number
To pin a block to the final page, select it and set its Pin to page property to Last page only in the right-hand panel.
5. Style a field
Click any placed field. The right panel switches to its properties:
- Font family - pick from the installed fonts
- Font size - 8pt to 72pt
- Font weight - regular, bold, etc.
- Colour - text colour
- Background - fill colour
- Border - line around the field
- Padding - spacing inside the field
- Alignment - left, center, right
Select multiple fields by holding Shift and clicking. Styles apply to all selected.
6. Adjust page properties
Click Page Properties in the top bar to open the right-hand panel:
- Orientation - Vertical (portrait) or Horizontal (landscape)
- Show grid - toggle the alignment grid
- Page Repeat - repeat the header and/or footer on every page
- Pagination - how the line items table flows across pages
The page size is fixed (US Letter, 8.5 x 11in); only the orientation is adjustable.
7. Preview and download
Click the Preview toggle to see the rendered invoice with real data. Switch back to Design to keep editing.
Click Download to export the rendered PDF. Great for printing or sending outside FoxCLM.
8. Save your design
Click Save to persist the design to this invoice. The layout travels with that invoice wherever it is viewed, shared, or downloaded.
Tips
- Keep the Header Zone light. It repeats on every page - too much content steals space from the content zone.
- Use the grid. Turn on Show grid (in Page Properties) to align elements precisely; turn it off for clean screenshots.
- Reuse across document types. The same designer powers payroll statements, expense reports, and payment receipts.
What's next
- Your First Invoice - create the invoice that uses this design
- Templates - manage your saved templates
- Invoice Designer reference - full field and style reference