Appearance
Accepting Your First Booking
FoxCLM gives you a public booking page where new or existing clients can pick a time and request a session. You review each request, assign a staff member, and approve or reject. This tutorial shows the full flow from both sides.
Part 1: The client's view
Each Booking Type (e.g. "Free Trial Session", "1-on-1 Lesson", "Group Class") has its own public URL. When a client opens that URL, they see a calendar with your available time slots.
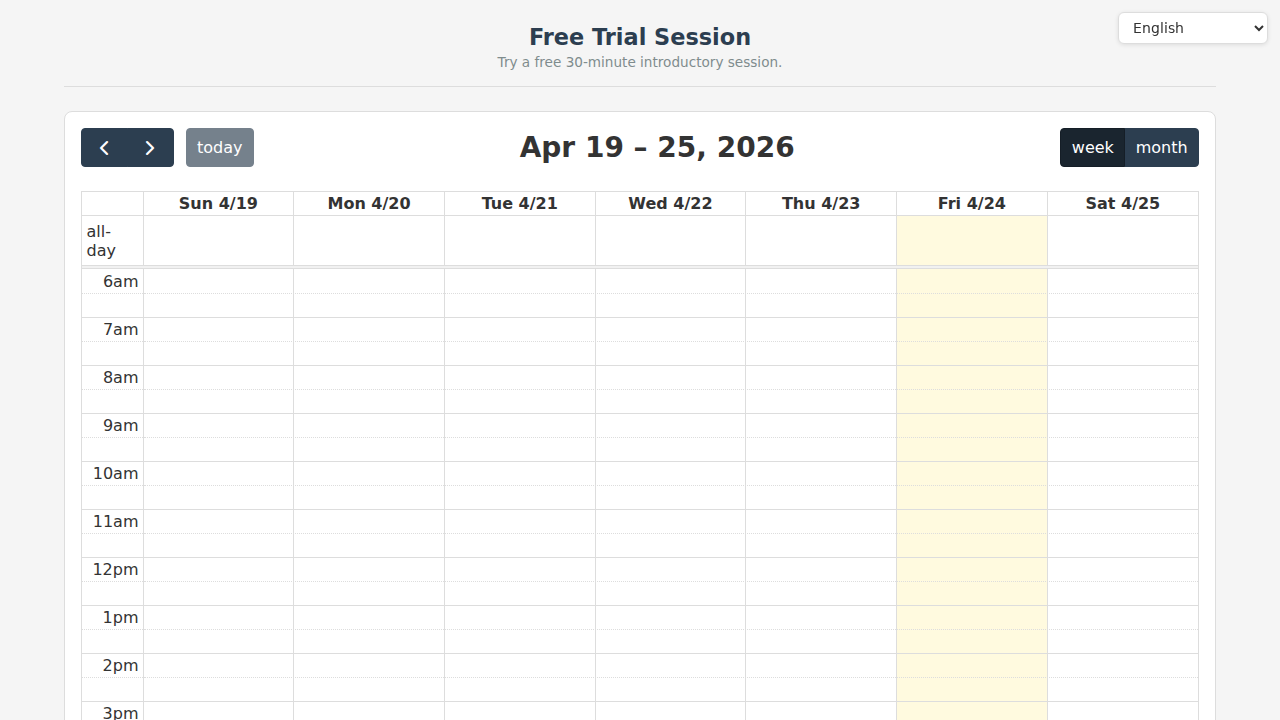
Key elements:
- Title and description - what you called this booking type (configured in Settings -> Booking Types)
- Calendar - switches between week and month views. Orange slots labelled "Available" are open to book; grey slots labelled "Full" are already taken or blocked. (The pale-yellow column is just today's date.)
- Today / prev / next - navigate dates, one week at a time; only dates from today onward are bookable
- Language selector - clients can switch language if you have i18n enabled
After picking a time, the client enters their name, email, phone, and optional message. They click Submit and the request lands in your Booking Requests inbox.
Part 2: The Booking Requests page
Click Bookings in the sidebar to open your inbox.
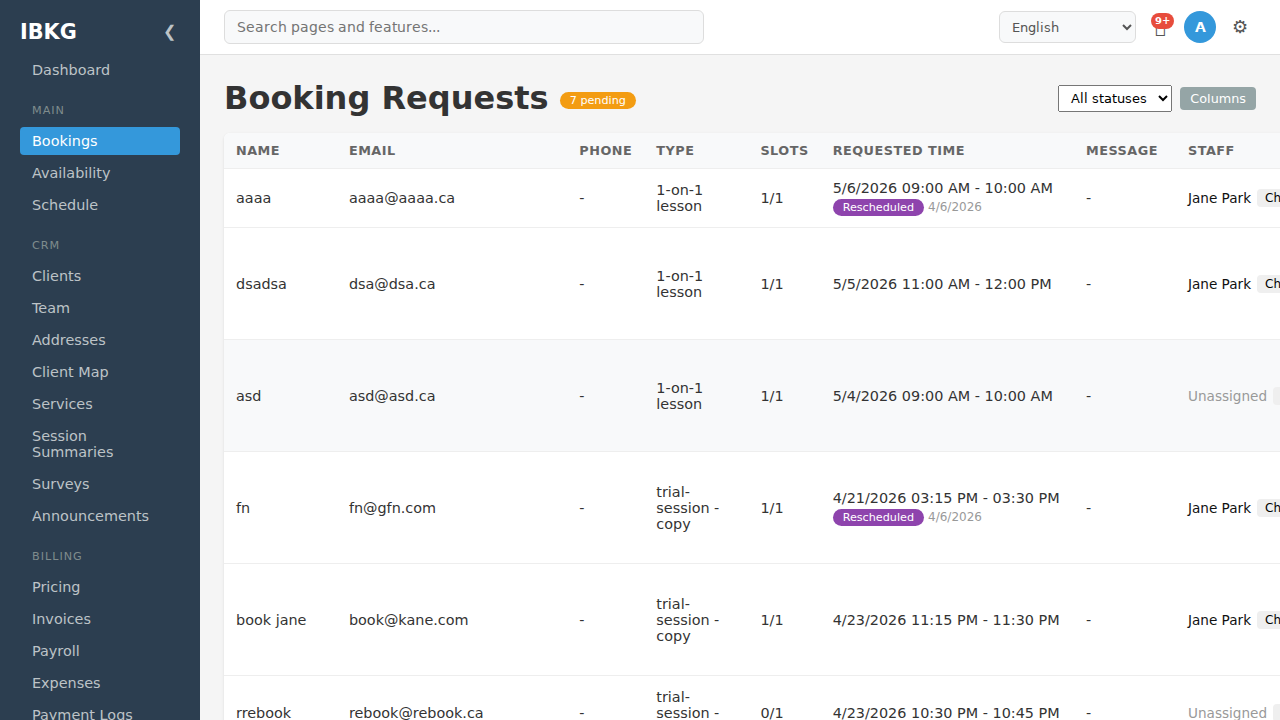
The top bar shows:
- Booking Requests heading with a "N pending" badge - your current backlog
- Status filter - show All / Pending / Approved / Rejected / Cancelled
- Columns - toggle which columns you want to see (Name, Email, Phone, Type, Slots, Requested Time, Message, Staff, Status)
Each row is one request with:
| Column | What it shows |
|---|---|
| Name / Email / Phone | Guest contact details |
| Type | Which booking type they picked (e.g. "standard-session", "trial-session") |
| Slots | How many slots they requested (1/1 = single slot) |
| Requested Time | The time slot they picked |
| Message | Free-form note they wrote |
| Staff | Who is assigned to handle this request |
| Status | Pending / Approved / Rejected / Cancelled |
Pending rows have additional Approve and Reject buttons on the right.
Part 3: Assigning staff
If you have multiple staff or collaborators, each booking needs someone to handle it. Click the Assign button on any unassigned row (or Change on an already-assigned one) to open the assignment modal:
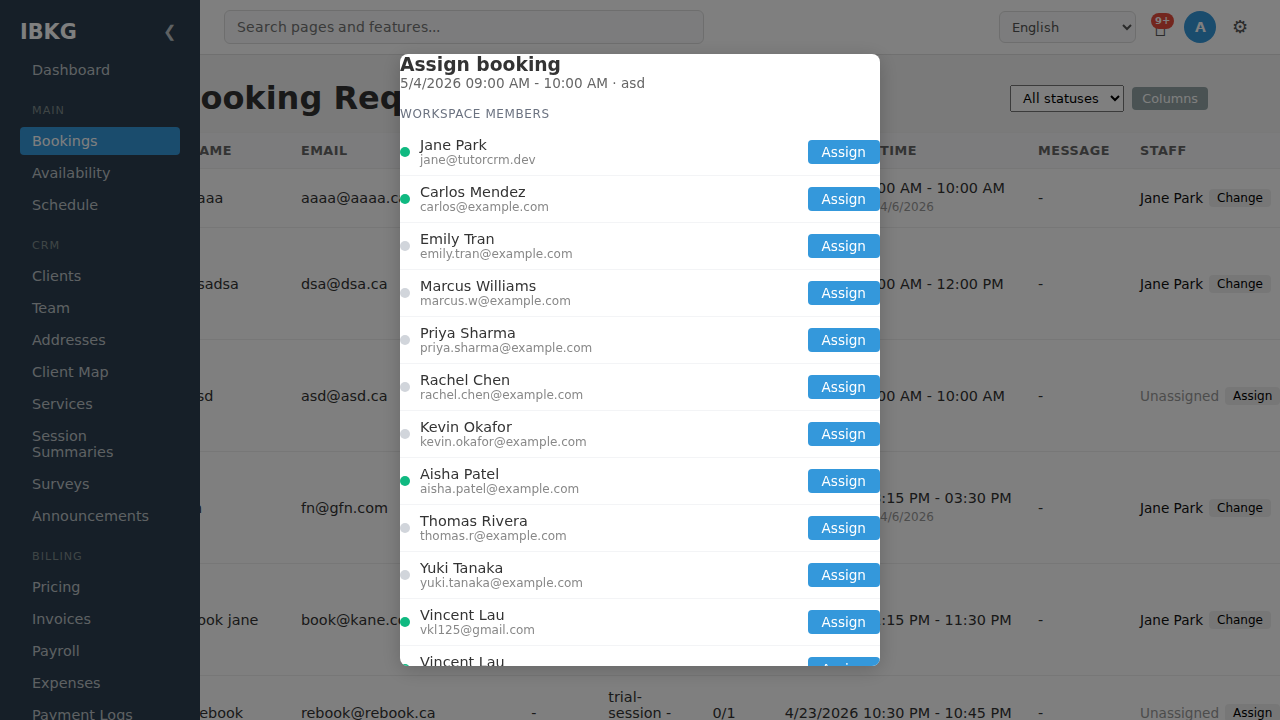
The modal lists every workspace member with:
- Availability indicator - green dot if the person is available at the requested time, grey if not
- Name and email
- Assign button
Click Assign next to the person you want to handle the booking. They'll receive a notification.
If nobody is available, the dots are all grey - you'll need to negotiate a different time with the client or decline.
Part 4: Approving or rejecting
Once a staff member is assigned, click Approve or Reject on the row:
- Approve - FoxCLM creates a session on the calendar, marks the request
Approved, and sends the client a Booking Confirmed email (as long as the booking type has confirmation email enabled - it is on by default). - Reject - the request is marked
Rejectedand the client is sent a Booking Request Update email inviting them to pick another time. - Cancel - for previously approved bookings that need to be undone. The client is notified and the session is removed from the calendar.
The confirmation email looks like this:
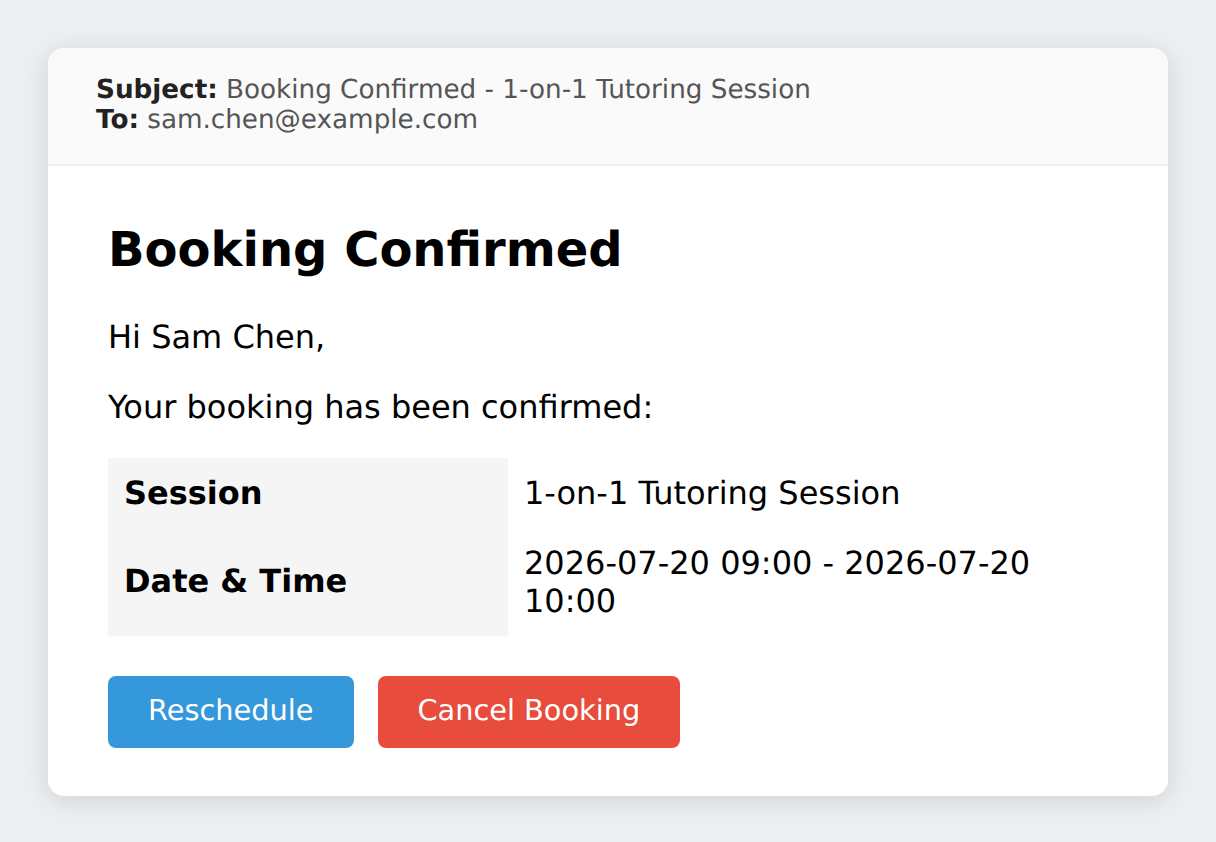
The Reschedule and Cancel Booking buttons only appear when the booking type has a reschedule and/or cancel window configured; otherwise the email shows a "please contact us" note instead.
Auto-confirm booking types skip the queue entirely - the client gets the confirmation email the moment they submit.
Automating with workflow actions
Approve, reject, and cancel already send their emails automatically - you do not need to wire anything up for the basics. For anything beyond that, attach workflow actions to the relevant statuses. The actions that apply to bookings are:
| Action | Outcome |
|---|---|
send_email | Send a custom email (e.g. a welcome note or reminder) |
create_notification | Drop an in-app notification for your team |
call_webhook | POST the booking to an external system |
sync_to_wrapped_booking | Map a workflow status change back onto the booking request (advanced) |
There are no per-event send_booking_* actions - the confirmation and rejection emails are built into the approve/reject buttons above.
Setting up a booking type
For this tutorial we used the seeded Free Trial Session booking type. To add your own:
- Go to Settings -> Booking Types.
- Click + New Booking Type.
- Configure:
- Name and Title - short name and public-facing title
- Description - what the session is
- Slot duration - 30 / 60 / 90 min
- Buffer - padding between bookings
- Advance days - how far ahead clients can book (e.g. 30)
- Min notice - how close to the start time clients can still book (e.g. 15 min)
- Include weekends - whether Saturday/Sunday are bookable
- Booking mode - requires approval (requests land in your inbox) or
auto-confirm(the session is created and confirmed the moment the client submits)
- Save, then click Share to get the public URL.
Copy that URL into your website, email signature, or marketing pages.
What's next
- Availability Rules - control when clients can book
- Workflow Actions - automate confirmation and rejection emails
- Your First Session - the calendar view