Appearance
Booking Requests
The booking system lets prospective clients request a session through a public-facing page - no account required on their side.
How it works
- You publish a booking link (from Availability settings)
- A client fills in the booking form with their preferred time and details
- The request appears in your Team > Booking Requests queue
- You review and approve or reject it
- On approval, a session is automatically created in the scheduler
The public booking page
Each booking type has its own shareable link (/book/<token>). Clients open it with no login and see a week-view calendar of open slots for that session type:
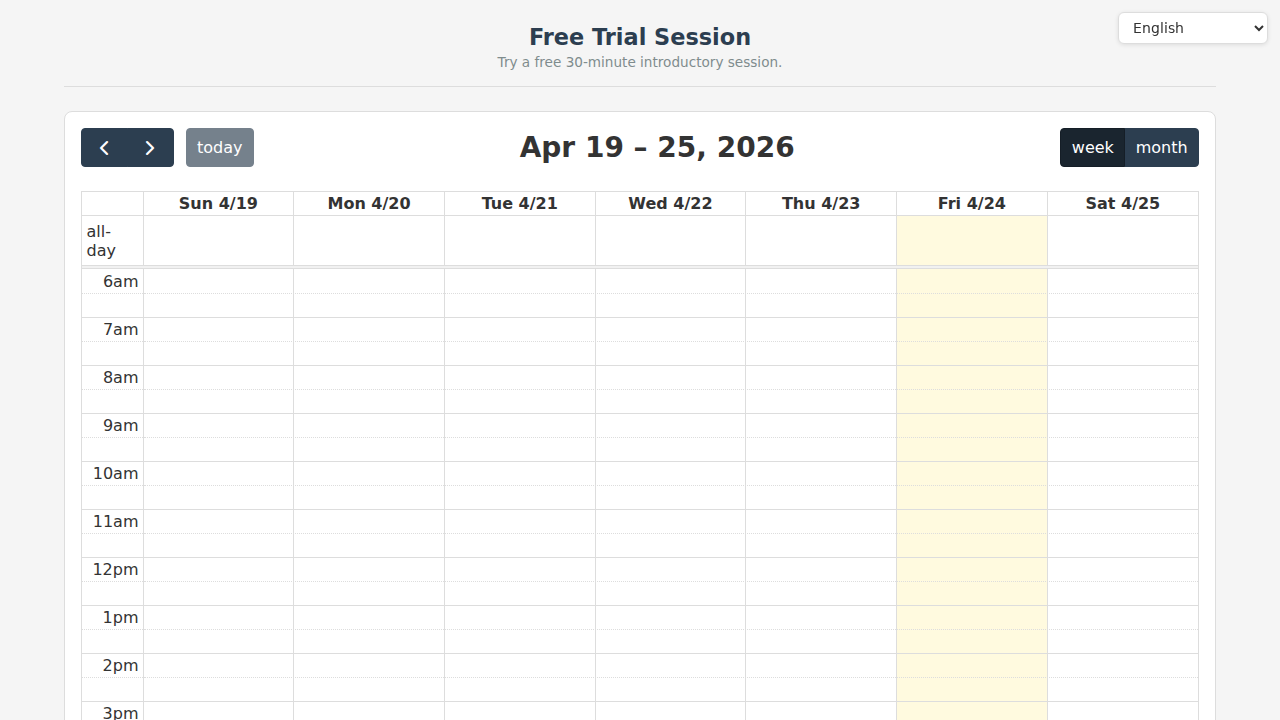
- The page title and description come from the booking type.
- Each slot is generated from your availability rules, slot duration, and buffer time.
- Available slots (orange) are open to book; Full slots (grey) are already taken or blocked by a busy event.
- The calendar opens on the current week and steps forward one week at a time - only dates from today onward are bookable. Past days and blackout dates show no slots.
Clicking an available slot opens the booking form, where the client enters their name, email, and any notes to submit the request.
Setting up your booking page
Go to Settings > Availability to configure:
- Booking types - define what kinds of sessions clients can request (e.g. Trial Lesson, Regular Session)
- Availability rules - set which times you are open for new bookings
- Buffer time - prevent back-to-back bookings
- Blackout dates - block off holidays and unavailable periods
Reviewing a request
Each booking request shows:
- Requested date and time
- Client name and contact details
- Requested booking type
- Any notes from the client
You can Approve (creates a session immediately), Reject (sends a rejection email), or leave it pending.
Assigning a staff member
When approving a request, you can assign a staff member or collaborator. The system shows availability indicators so you can avoid conflicts.
Confirmation email
When a booking is confirmed, the client receives a Booking Confirmed email at the address they submitted:
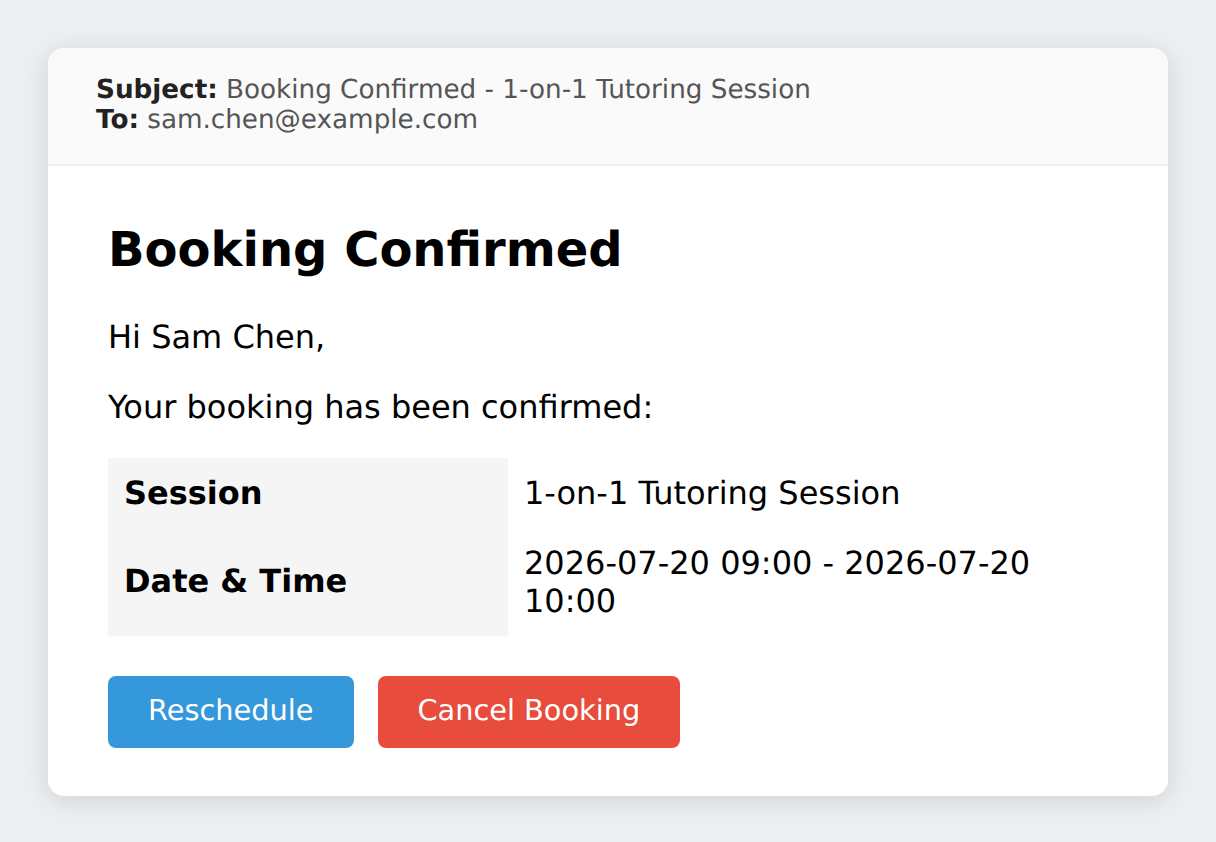
It fires in one of two ways, depending on the booking type's mode:
- Auto-confirm - the email is sent immediately when the client submits the form.
- Request / approval - the email is sent when you Approve the pending request (manually, or via a workflow action).
Behaviour:
- The email is only sent if Send confirmation email is enabled on the booking type (Settings > Availability).
- Subject line:
Booking Confirmed - <session name>. The body lists the session and its date and time. - Reschedule (blue) and Cancel Booking (red) buttons appear only when the booking type has a reschedule window and/or cancel window configured. Without those windows, the email shows a "please contact us" note instead.
- A rejected request instead sends a Booking Request Update email, pointing the client back to the booking page to pick another time.
Automated actions
Workflow actions can fire on booking request status changes:
- On new request - notify the owner
- On approval - send a confirmation email to the client
- On rejection - send a rejection email to the client
Configure these in Settings > Workflows & Statuses.